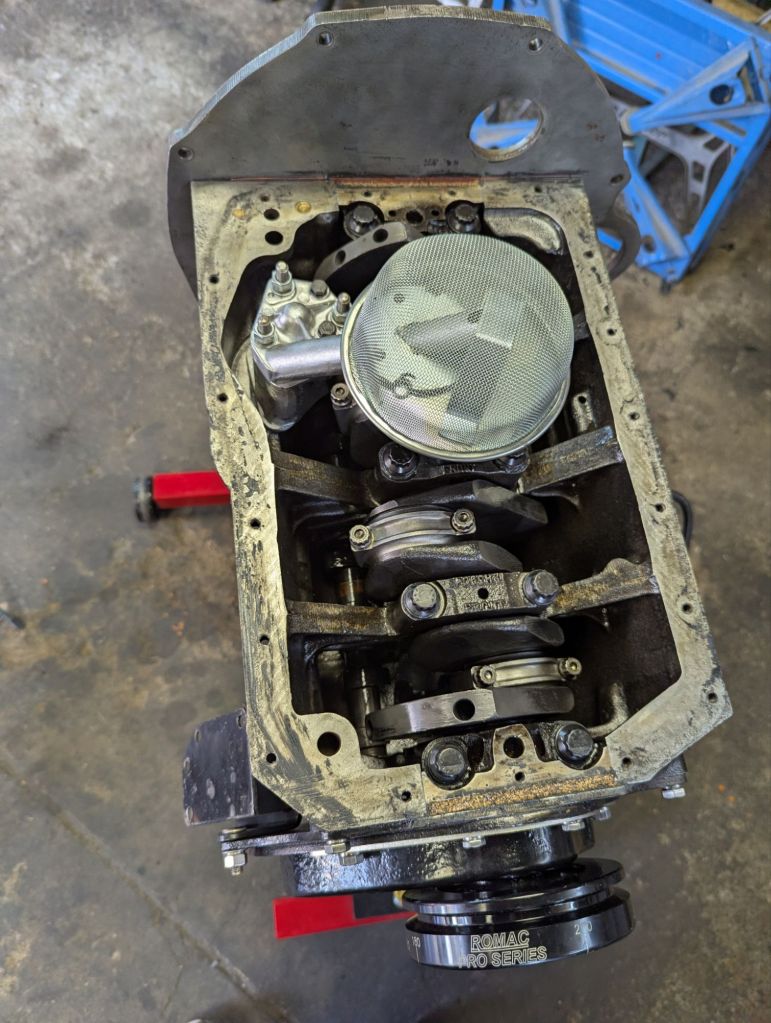
Hard to believe that five months past, since we assembled Mildred’s engine. A few open tasks and issues prevented the final completion. The biggest problem was that I bought ARP main bearing studs instead of bolts. The 18V engines need those as otherwise the oil sump cover does not fit. Although I know that it is questionable if ARP main bearing bolts are actually needed – the price difference to new standard ones was minimal. And by the beginning of July – the missing parts finally arrived.
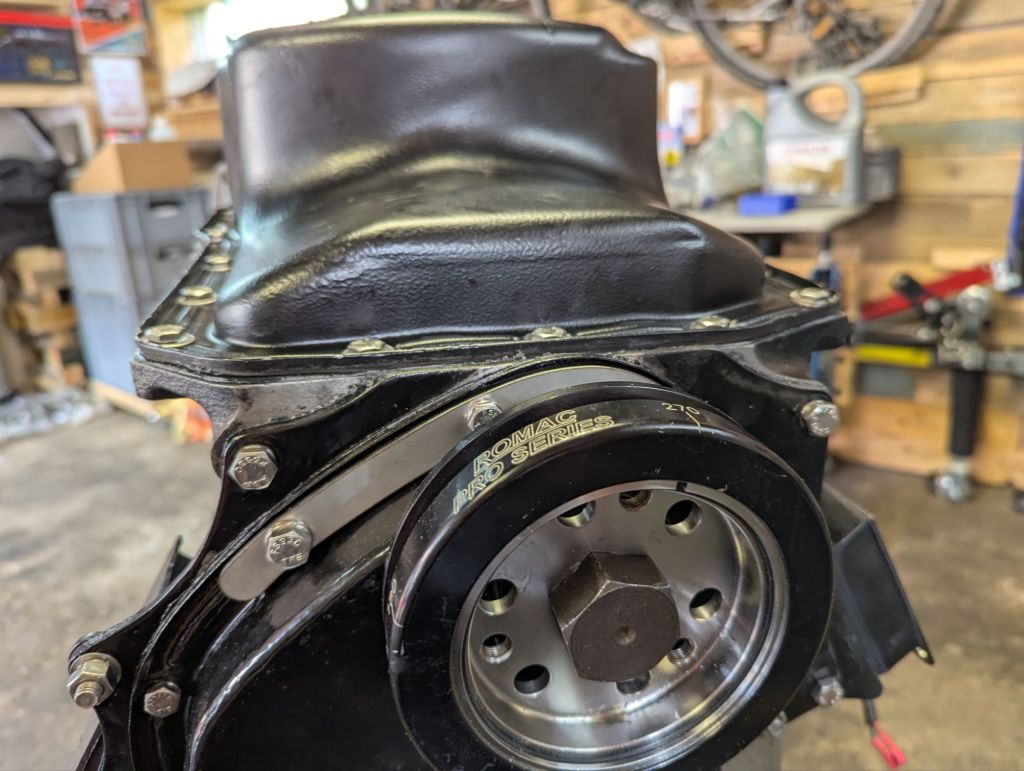
Another thing I was concerned about was the timing chain cover could leak. Even though we used Loctite sealant for the timing chain cover gasket and flatten the surface of the cover as good as possible. A reinforcement bracket like the one from the MGB.tips article would be good. Those are sold in the US by BritcarFixes. But $42 plus shipping plus import tax was too much for my taste. Additionally, it would be nice to have this in stainless steel to match the new bolts.
I decided to build them myself. First, I scanned the timing cover. Then I imported the scan into FreeCad as background image. Next I constructed the part that matched the outline. Getting parts laser-cut costs a bit. So you don’t want to make mistake. 3D-printing a test bracket from the drawing costs only a few cents. And the second iteration was spot-on. In Germany the alternative to Send-cut-Send is Cutworks. Getting a single bracket would have been expensive as expensive as getting one from the United States. But as soon as I order 10 or more the costs per unit as better. In order to improve the math – I decided that the bracket is needed on all MGB engines going forward – I went ahead and ordered ten 🙂
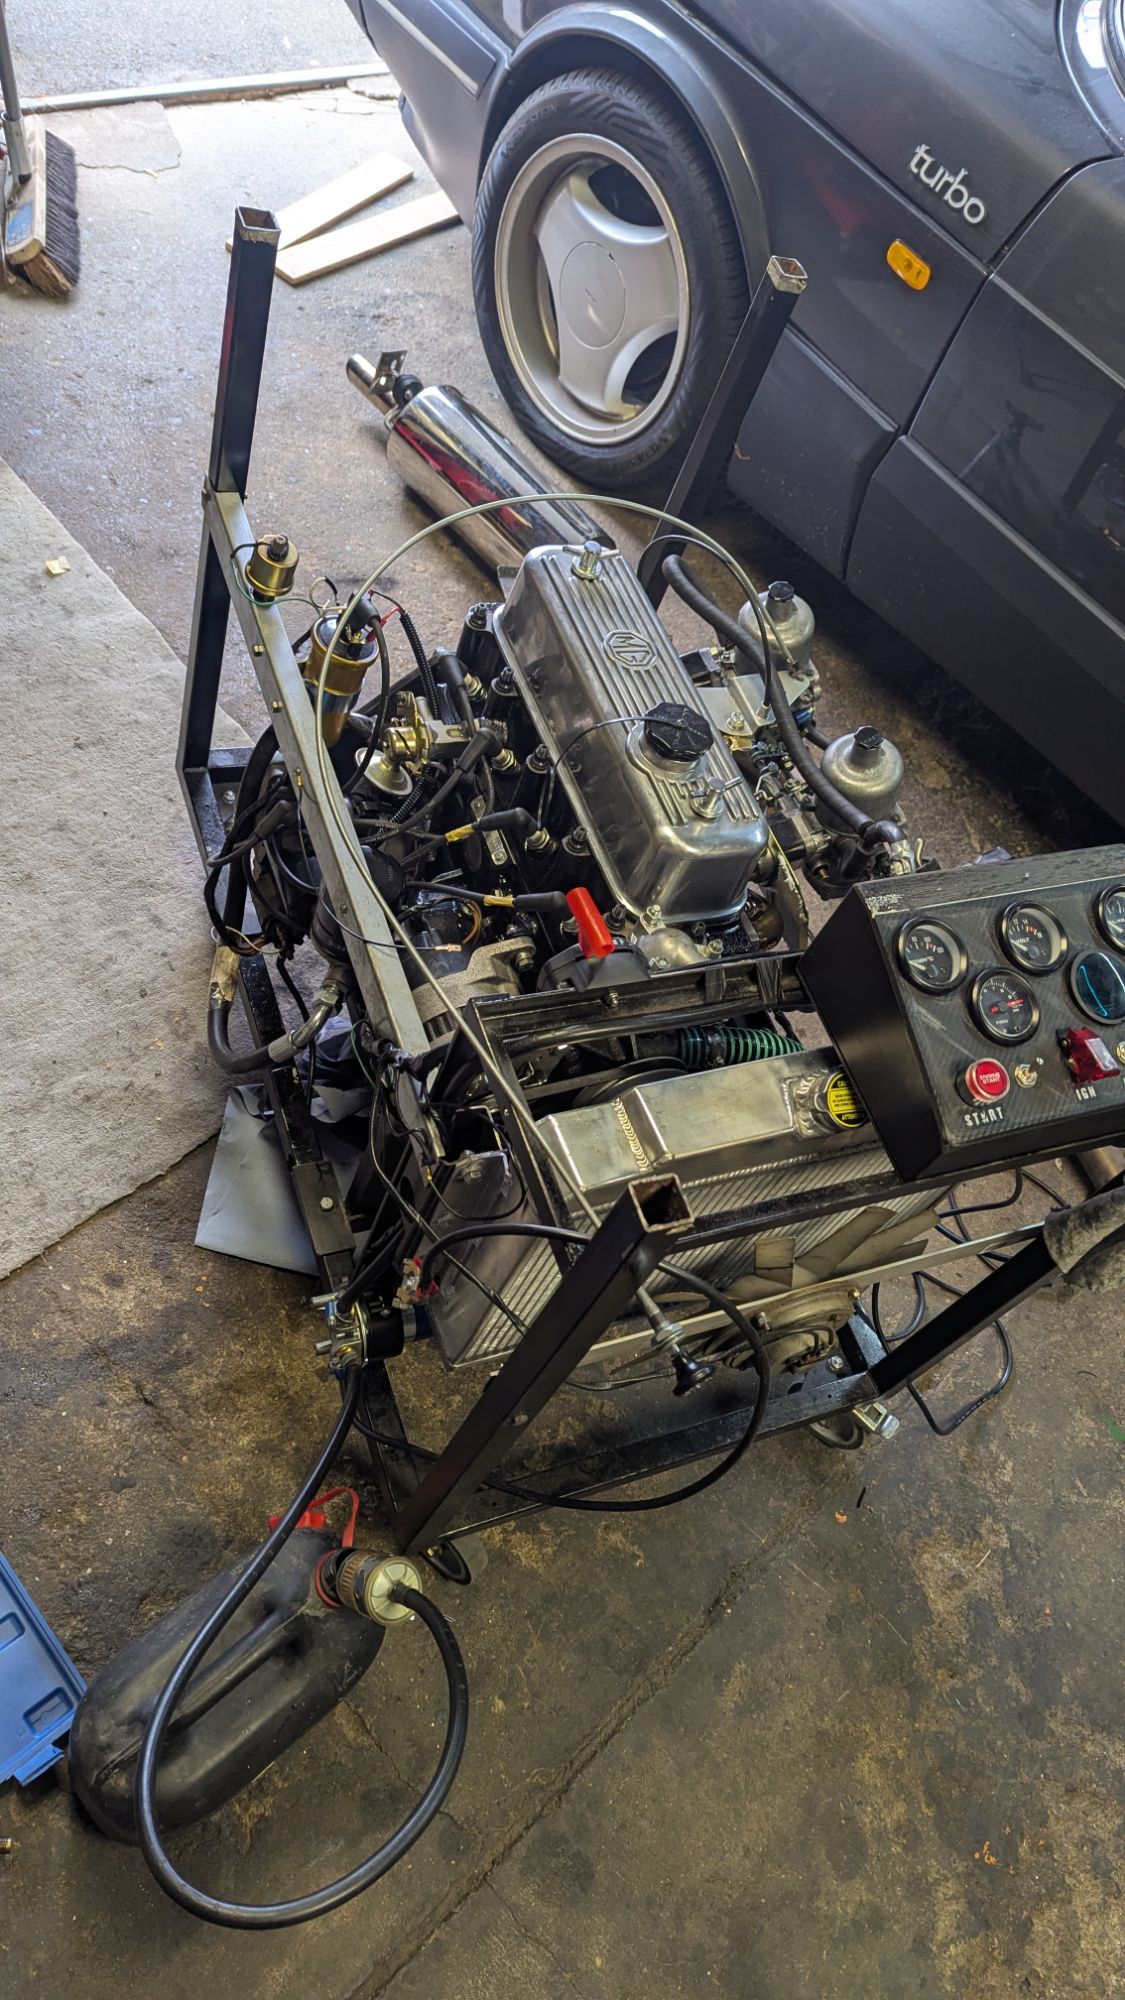
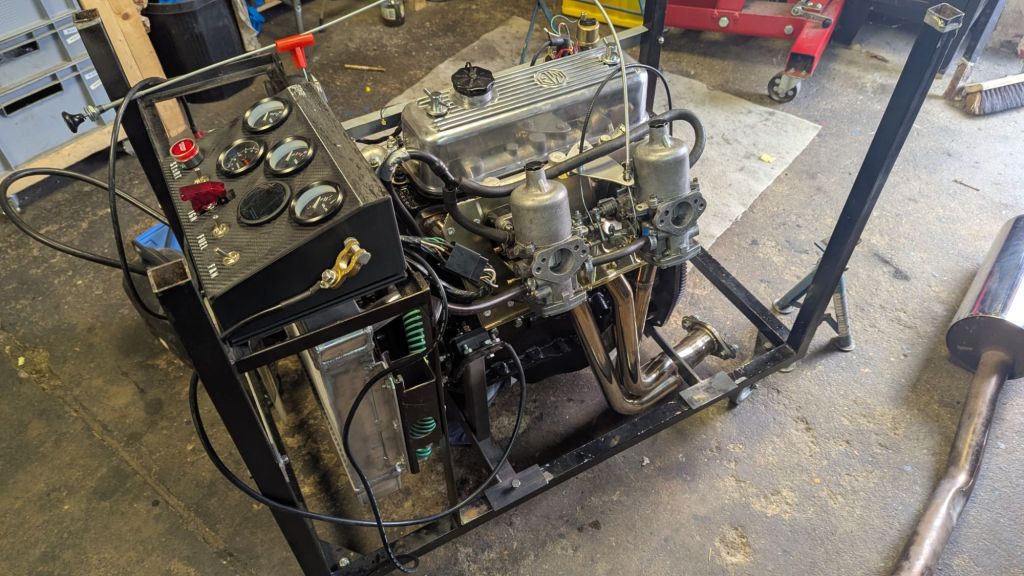
As noticable by the lack of posts this year – not much happened after this in the garage this summer. At some point in August I got around fitting the bolts and oil sump. By this time the front cover reinforcement bracket also arrived. After our summer vacation I continued testing the spare 18V582 on my test-stand. Initially it would not start with the overhauled HIF4 carbs. After switching to the set of HS4 rebuild last year, the engine started up easily. Tuning the igniton timing and sync the carbs followed. While fiddling around with the Gunson Colortune to set the fuel richness, I realized that I should add the AFR gauge I bought for the 12-in-12 Challenge to the test stand.
The cheap oil pressure gauge was working fine – I double checked by using a older Smith dual gauge that had a broken temperature sensor. The eletric temperature sensor work fine with a Smith gauge. But the cheap Amazon gauge in my test stand need a sensor with different resistence. To fit this I had to order an adapter to fit the 1/8 NPT style sensor. Bambu had a promotion for the AMS lite kit that fits by A1 3D-printer. The wood control box I made did not leave space for a fifth 52mm gauge. So I quickly designed a part in Freecad and tested two color printing by adding text underneath the toggle switches. The wiring could be neater – but it works and I just screwed a cover on the botton to hide the mess.
Henrik recommended to check the choke on the HIF4. And indeed – I forgot the thin paper gaskets on the choke setup. The ACD needles in the HIF4 carbs let the test engine run a bit better compared to the HS4 with AAU needles. With the HS4 I had unsteady Lambda values at 2000 rpm – ranging from 0.8 to 1.1. while the HIF4 gave me a more constant reading between 0.9 and 0.95. Overall the 18V582 engine runs quite good. I bought it as a fallback option in case I mess up Mildred’s rebuild. With the engine test stand upgraded I ran out of excuses not to test the rebuild engine.
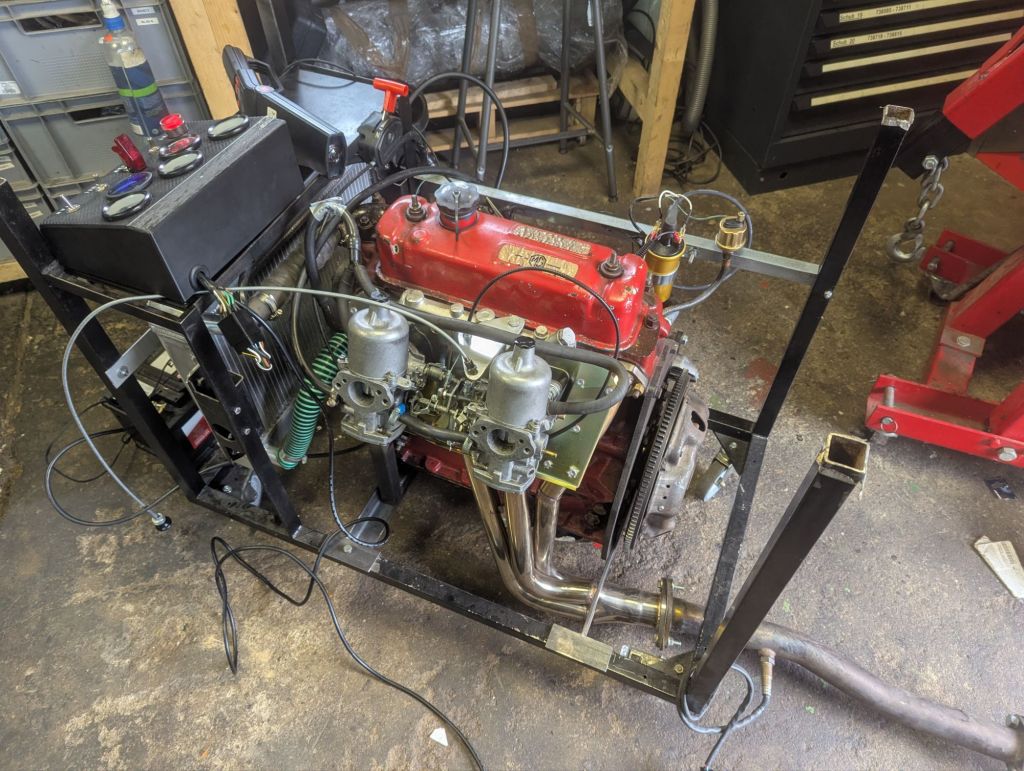
Last weekend in September I finally switched the engines on the test stand. After draining the water from the cooling system, I removed the carbs, the distributor and starter motor. After about two hours I started doubling check the valve-clearance on the Mildred’s engine. I remembers that the lock plate for the rocker shaft was still missing. But the part I ordered would not fit right away. The bore for the stud was off-center. Using an 8mm drill bit I prolonged the hole a tiny bit – and voila- the lock-plate fits.
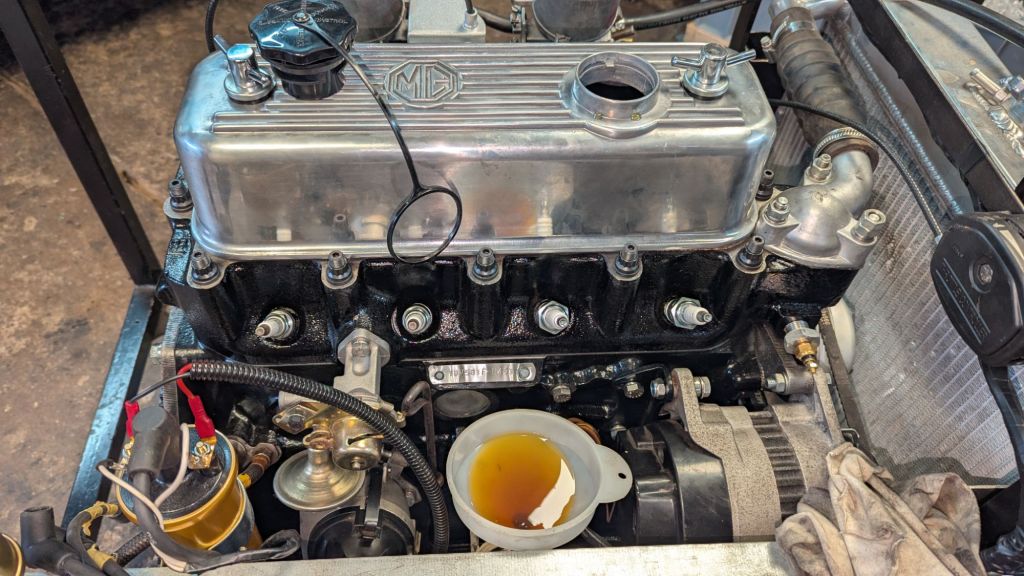
Unfortunately, it took another four weeks until I was able to continue. Yesterday, I finally filled the cooling system with water. My main concern was priming the oil pump. On the test stand I bypass the oil cooler by directly connecting the hose to the filter. With the filter off and a small funnel I slowly filled the oil cooler hose. This took quite a while until I could not add any more oil. After removing the spark-plugs I cranked the engine a few time with the starter. My hope was to get an oil-pressure reading after 4 or 5 tries – this worked on the test-engine. But no matter how many times I tried – I couldn’t get any oil pressure.
First I checked the oil pressure relief valve. It was seated correctly. I decided to add a shim/packing disc for the first few tests without sparks. But this also did not make any difference. To my knowledge, the uprated relief valve spring does not require the shim – so I removed it again. As many MGEXP forum entries write about the oil pump gasket – I started getting concerned that we used the wrong one. But fortunately I had pictures and new that it was the 5-main-bearing variant. After some messages with Henrik, he mentioned that the starter might not manage enough revs to get the air out of the pump. So today I went ahead and decided to risk it. The first fire up did not work straight away. I decided to double check static ignition timing. And sure enough – I messed up the firing order 1-3-4-2 when reconnecting he spark plugs. With this fixed and choke fully pulled I pushed the Start button. After just a few turns of the starter, the engine came to life. As Henrik recommended I immediately cranked it up to 3000rpm. My eyes locked onto the oil pressure gauge – the approx 20 seconds that followed felt like an eternity. But all the sudden – BANG – full oil pressure.
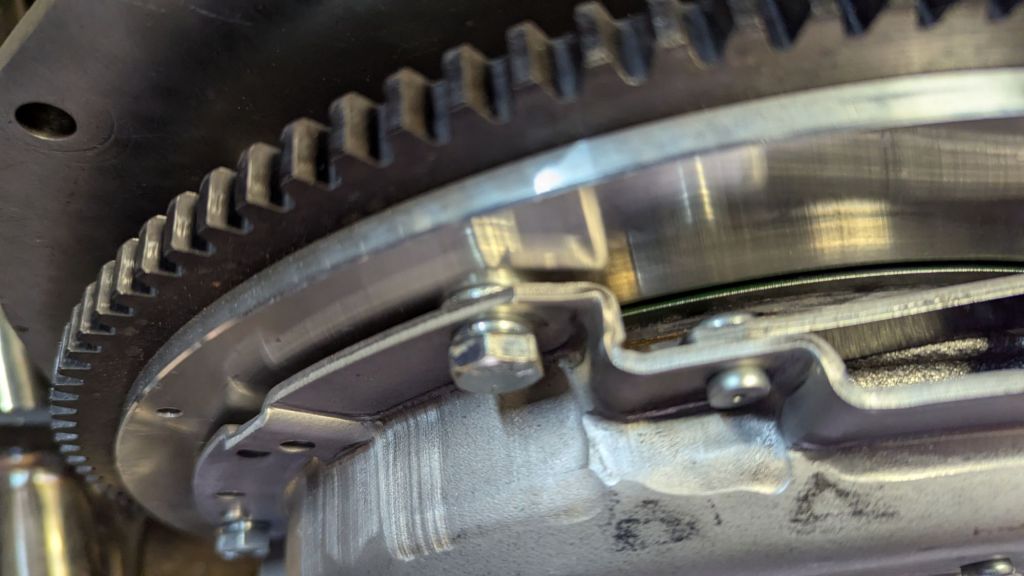
On a Sunday I could not compete the 20min run-in period for the cam-followers at 2500rpm. This would be too loud for the neighbours. A small water leak from the heater valve and lower coolant hose also need to be fixed. But I am really happy and reliefed that this first start went well. Last thing I did today was offered the Mazda clutch plate to the Fidanza flywheel. Wish me luck for the first longer running-in period tomorrow.


Leave a comment