
Ghee – only 3 working days left if I want to make my deadline. So, where are we? On the bright side: The seats are in and the newly made supports are pretty awesome. Normally the seats are screwed to 43 cm long wooden blocks that are mounted between two chassis crossmembers. Using two 50x50mm metal square metal tubes that are 50cm long I was able to move the seat roughly 6cm further back and an 18mm lower. This gives significantly more leg room. Ok, I now need to make new covers for the rear leaf springs – but that’s alright.
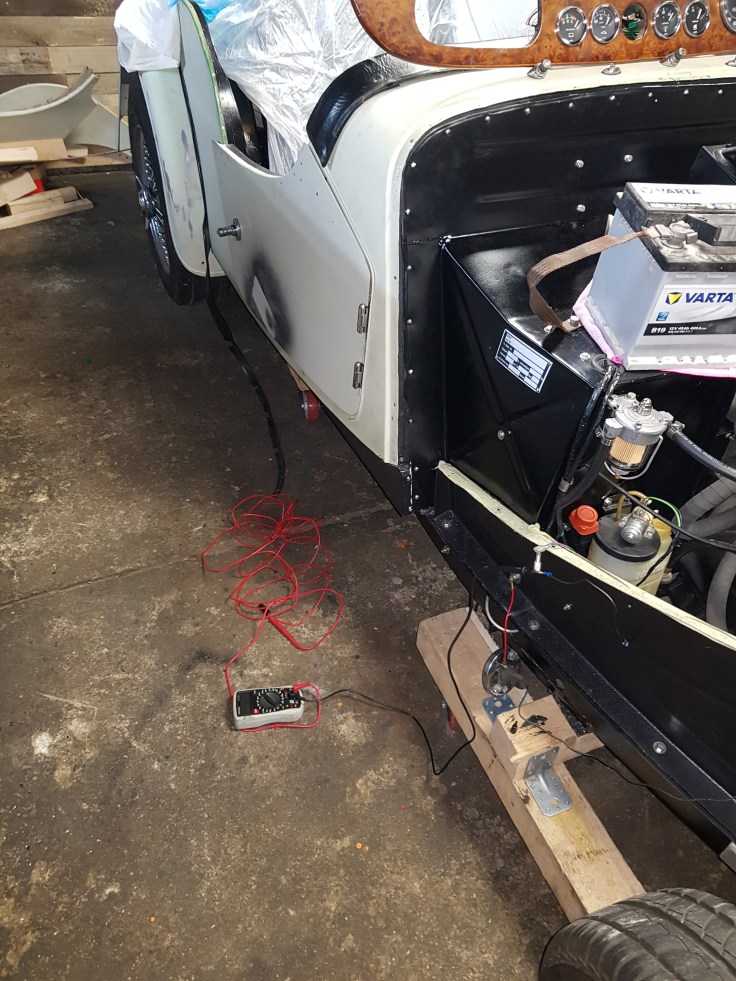
Also great – the car is on its own wheels now again. We even rolled it out of the garage when my wife and daughter visited me with the MGB to take a “family picture”. While doing this I noticed that the drivers-door still needs adjustment. It sags now after I tightened up all hinge screws ago. Besides adding a shim between the lower hinge and the door there is not much I can do. This was on my task list for today – after checking all electrical circuits. When I had the wiring harness on my desk – each cable connection was measured a couple of times. Another check was made after the loom was installed.
After temporarily connecting a battery I started by adding a fuse at the time. First up is the EZ Powersteering. This has two connections. The primary is going to a 30Amp fuse connected to the starter motor using the cable supplied with the kit. The second connection is to a 15amp fuse connected to the ignition circuit (white). Even we both connected and ignition on – the powersteering doesn’t work. On the MGB the engine has – I believe this is the same here.
Fuse 2 is for the indicators and horn. Besides the fact that the indicators plastic caps look crappy and yearn to be replaced, indicators and horn work. The hazard flasher on fuse 3 works to good because I made a stupid mistake. Originally the Morgan dashboard has Lucas hazard switch. Now as my father replaced this with a Matthias Kauffelt dashboard in 30 years ago – there is a simple Lucas On/Off toggle switch for this. Logically this requires some from of relay – otherwise (like in my case) all indicator lights will go on as soon as the hazard fuse is connected. I have a workaround for this now – but I need to get a proper relay or switch.
Brake light switch was the next issue. It took me quite a while and a bit of measuring to find that the rear loom from AutoSpark had a missing connector for the green-purple cable. Speaking of connectors – at this point I made the decision to replace the original bullet-type connector with SuperSeal ones. Not necessary for the technical inspections this week – so I can do this next month.
The next problem took a painstaking 6 hours to debug and resolve. After inserting the fuse for the washer/wiper – the wiper motor started with ignition. Having measured all lines over and over again I just couldn’t get my head around the problem. Doubling checking the wiring plans just confirmed that I cabled it according to the plan. After getting home yesterday evening I found this brilliant video Land Rover Lucas wiper motor problems and fix! – YouTube Around minute 20 he explains the little switch inside the Lucas wiper motor.
Loaded with new energy I headed to the garage this morning, ripped the wiper motor out to check the plastic pin. Much to my surprise it was perfectly OK. If I only had another motor to cross-check? Oh, wait – Miffi (my Mini Cooper) has a working wiper system!!! So it had to act as donor for the test – which ended with the same result. Running out of options the box with the old loom fell into my eye. I started with checking the cables on the old loom – just to confirm that I did wire the new loom correctly. And at this point – really more subconsciously – I noticed that there is something different with the wiper motor connector that came preinstalled with the AutoSparks loom. They hooked up the pins in a wrong order!!!!.
Getting the cables out of the connector without destroying them is fiddly. I ended up flatting a pieces for thin metal with the hammer that just fits beneath the connector. You then twist this 90degrees which will lift up the metal hook on the Lucar-style plug insight. Afterwards you need to carefully bend this down again and insert the cables in the right order. (see pictures).
Now I just need to clean up the mess I made during debugging and fixing….
(OH – BTW: if you need a new wiper motor for your Morgan – buy one for a Mini MK2 from a Mini spare parts store. It is the same Motor and costs a fraction of what you will pay elsewhere)

New seat supports. 
You can already see that the seats are much further back in the car when you compare it to other Morgan 4/4 
Rolling 

tracing the fault with the brake lights 


fuse 10 in – wipers will run… 
easier to check the cabling before the wing is back on 
Hmm -Green-purple is the brakelights… there is a bullet connector missing 
two green cables in fuse 10 – one to the wiper stalk the other to the motor. wiring diagram – check ! 
tail all cabled up now 
Trying to reduce the dust on the chassis … hopeless effort 
“Family picture” 🙂 
Taking the wiper motor apart. I also removed all the old grease and cleaned it up now. 
I am sorry Miffi!!! – you will get you wiper motor back – I promise 
The Mini wiper motor is much quiet compared to the old one I had in 
Autospark connector in the back – cabled as it was delivered. 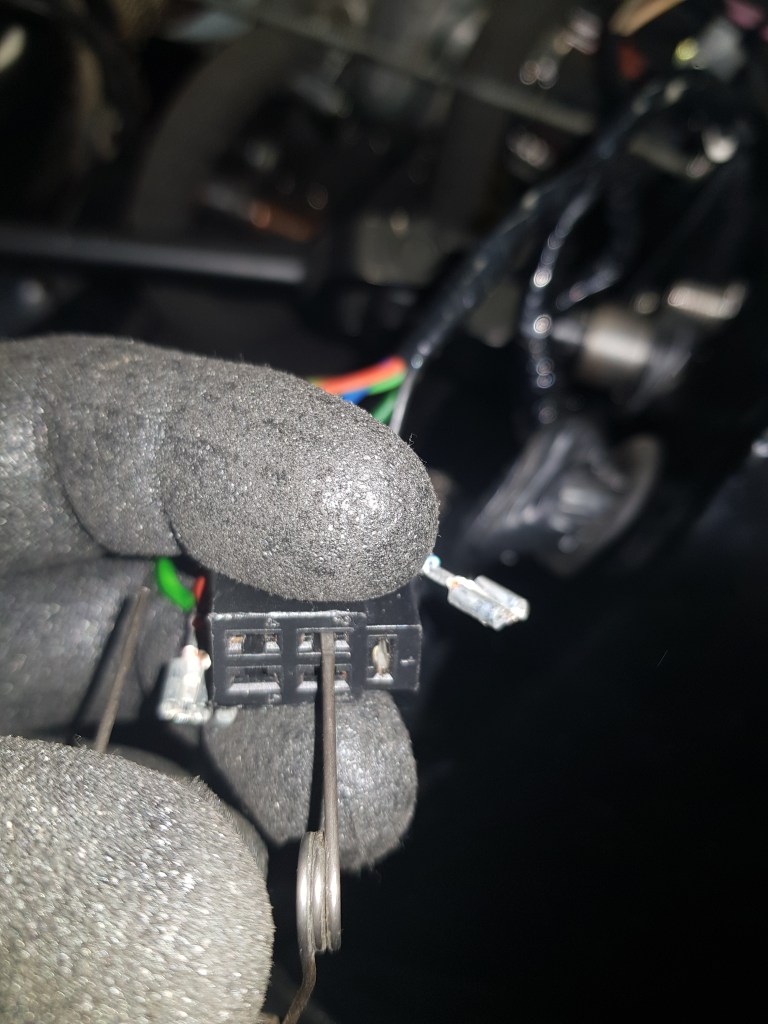
carefully removing the lucar plugs 
difficult to see – but the little hook on the top needs to be bend out again 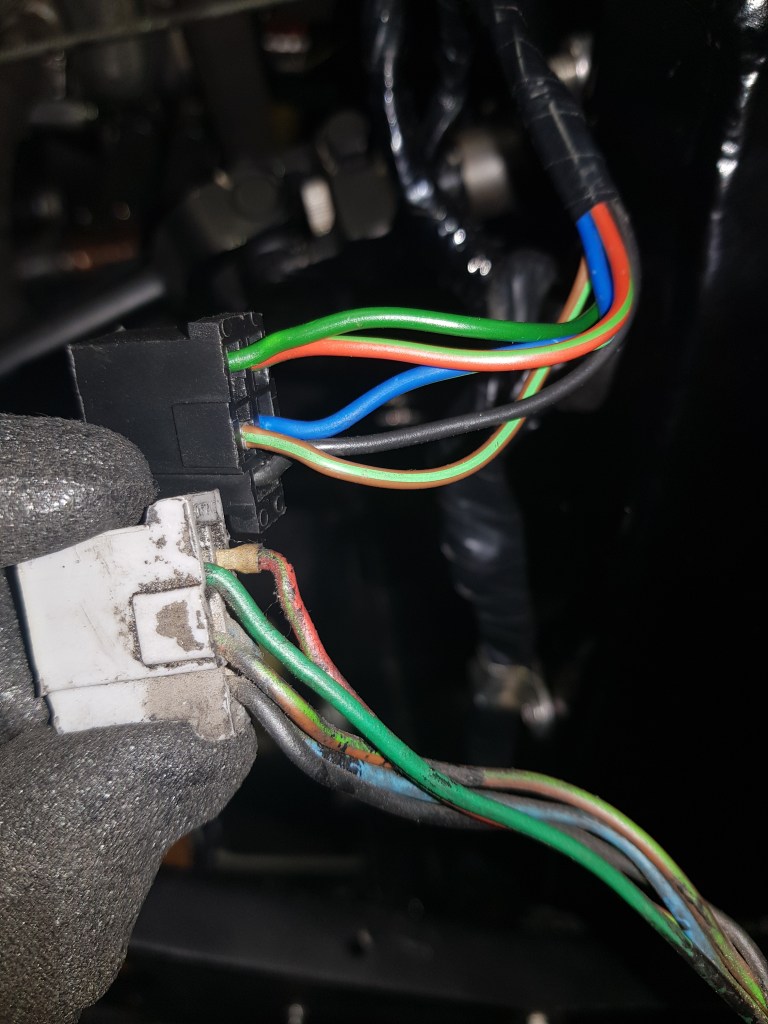
AutoSpark – problem solved.!!!

Leave a comment