Ever since I bought the Brantz International Pro2 a few years back I had the idea of creating a proper Rally Dashboard. At the same time I had a something in mind that would not require changes or damage to the original dashboard. After all – most of the time I don’t need the equipment. Furthermore, the wife-acceptance-factor of a permanent Rally dash is zero or even negative in this house. Some form of mounted solution is required – but that brings up the question: what is the best mounting point for this?
Initially I only had the tripmeter. And that was small enough to be screwed to a small piece of plywood. On the back I added an angled bracket which attached to the side of the center console. The Brantz could be swapped with a wireless charging cradle for my mobile phone. Speaking of which – I tried a few solutions. Magnetic holders, SP Connect, simple clamping ones and gravity gripping ones. The all work OK for city traffic and Autobahn – none of them was perfect for somewhat more courageous b-road driving or rally use. Besides – while the bracket was slim and black it still did not look great.
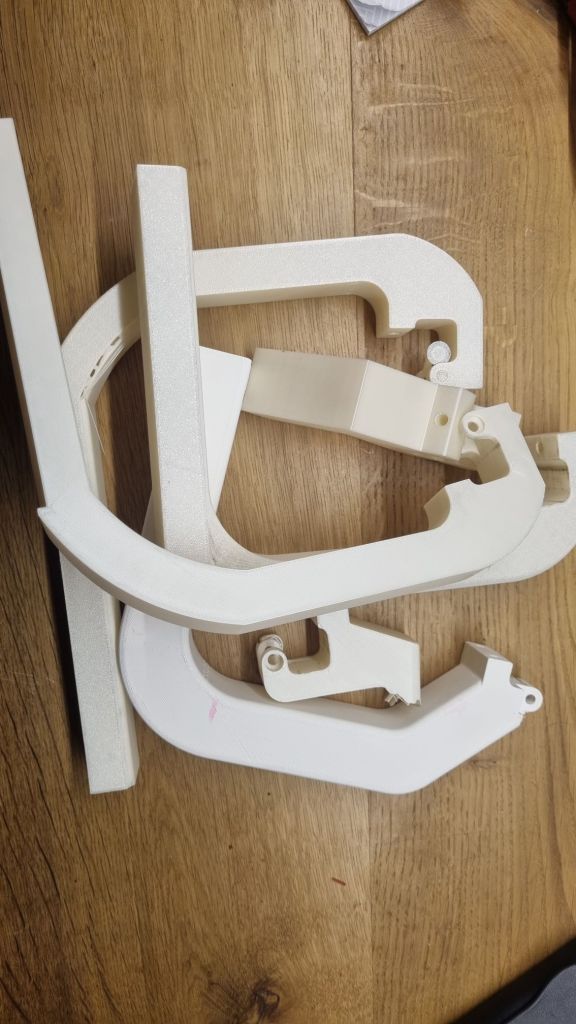
Over the last few months I repeatingly asked my son if he could design and produce one thing or another for me. After all – he studied this stuff. I assume it was a clever move of him to get the family in getting me a Bambu A1 for christmas. With that on my desk now – the world of 3D printing opened to me. Getting into CAD took me a bit, especially as I choose to use FreeCAD. It does have some quirks and some things might be harder to do compared to e.g. SolidWorks – but it is OpenSource and runs extremely well on ChromeOS (when activating the dev mode)
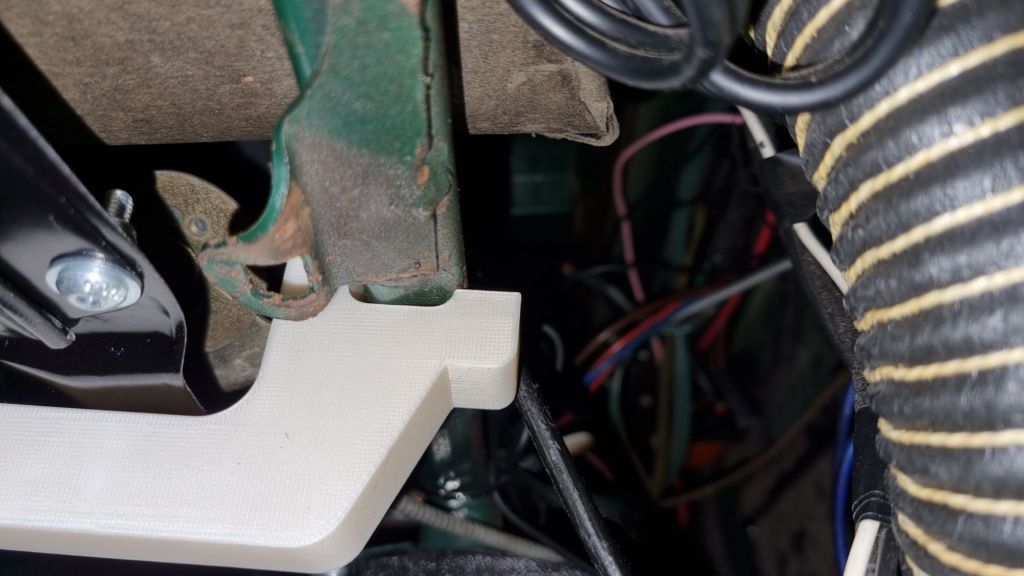
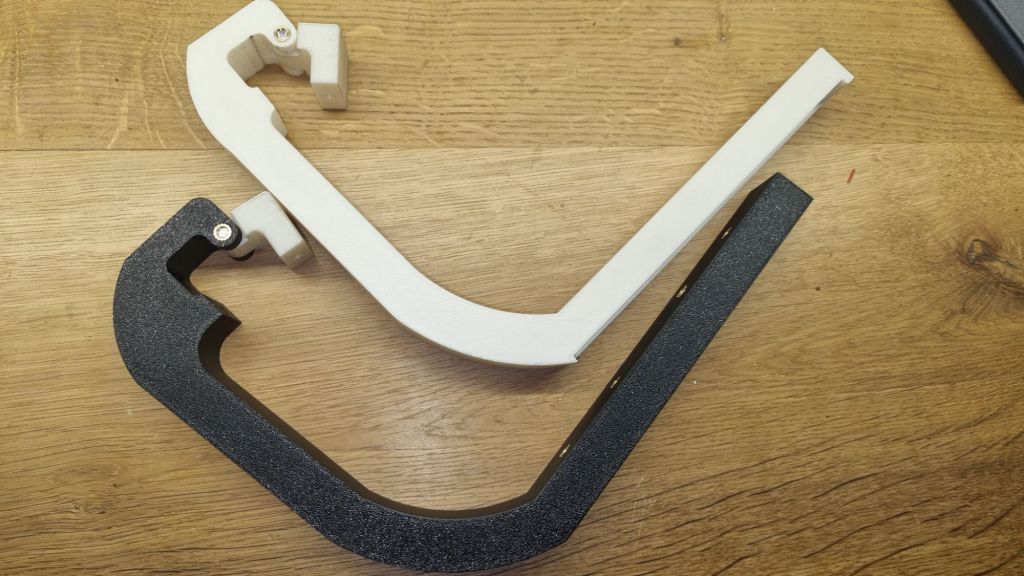
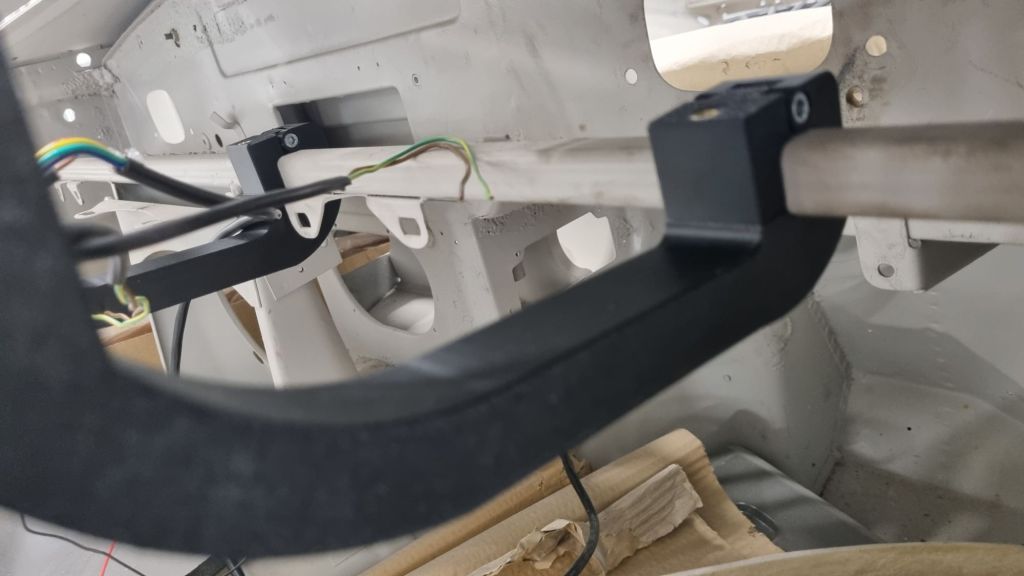
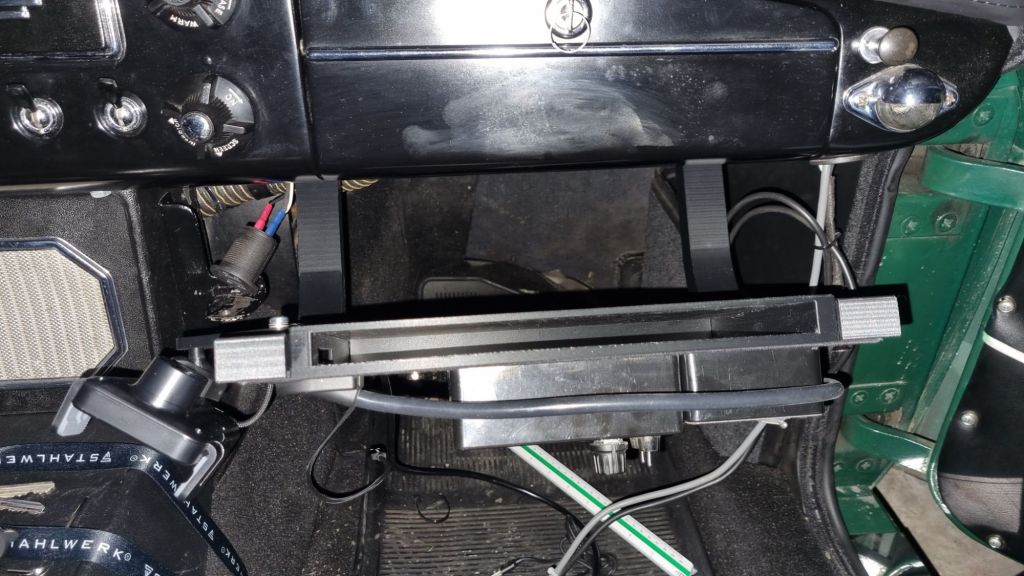
And while working on Mildred’s wiring and dashboard I got the idea for a really good mouting solution. The MGB has a ~20x20mm steel bar running behind the dashboard from left to right. The steering wheel bracket attaches to this and the center console support is welded to it. It is a few centimeter behind and upwards of the lower dashboard edge (at least on the early Chromebumper MGBs with metal dashboard). What if I could clamp a bracket to this bar which in turn holds the Rally dash? Well, it is not only for the MGB. A slightly different set of brackets for the Morgan is already in the work – another set for the Mini at least sketched on paper.
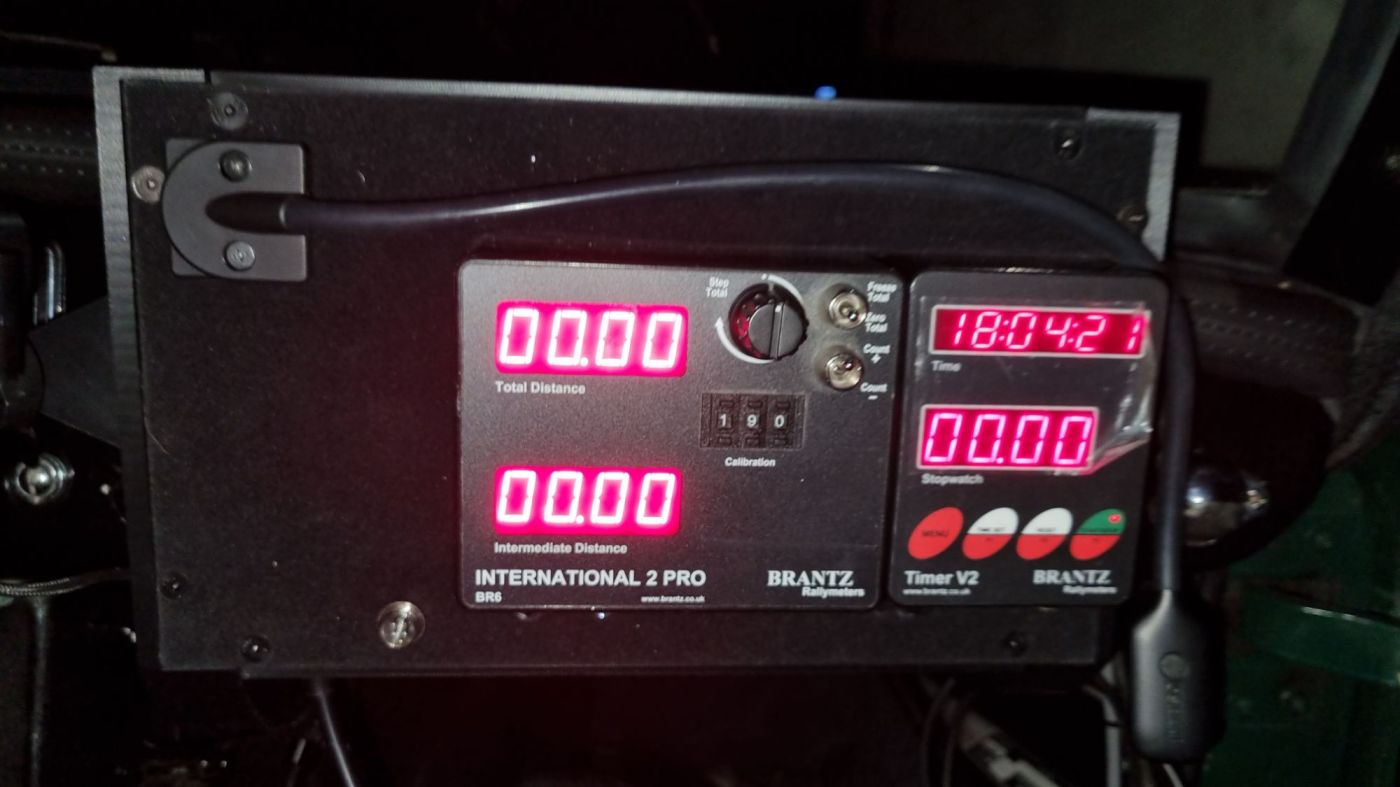
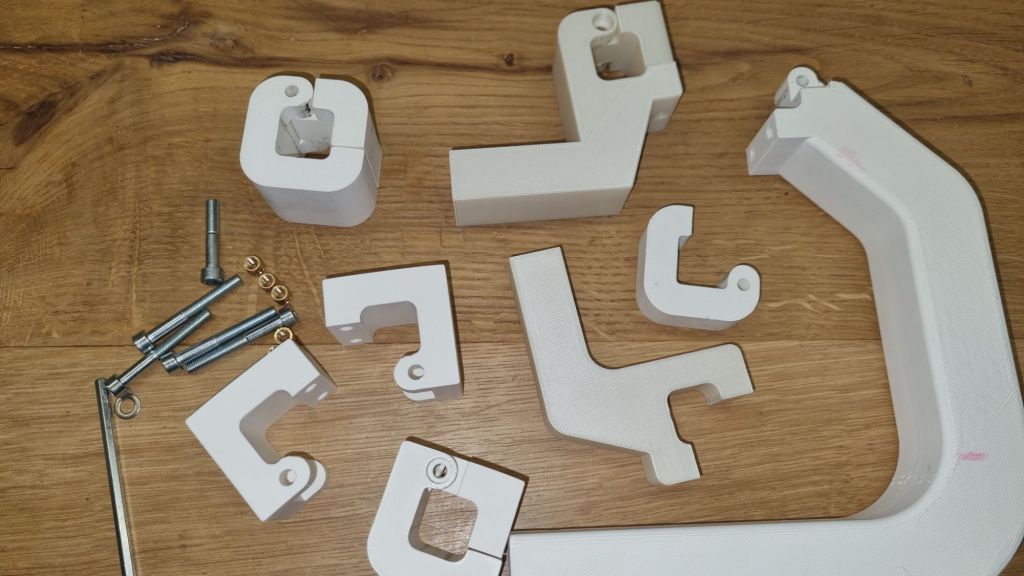
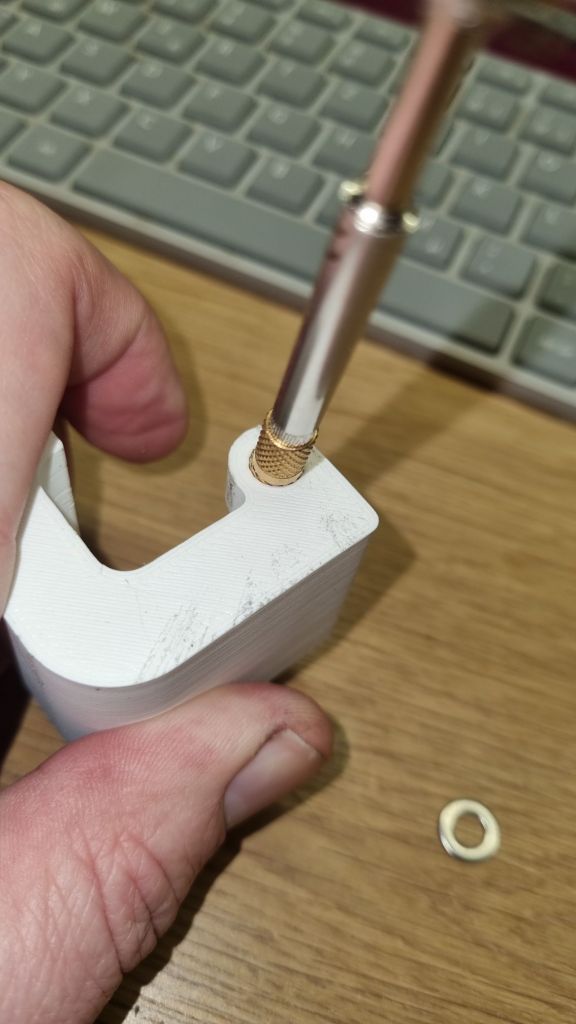
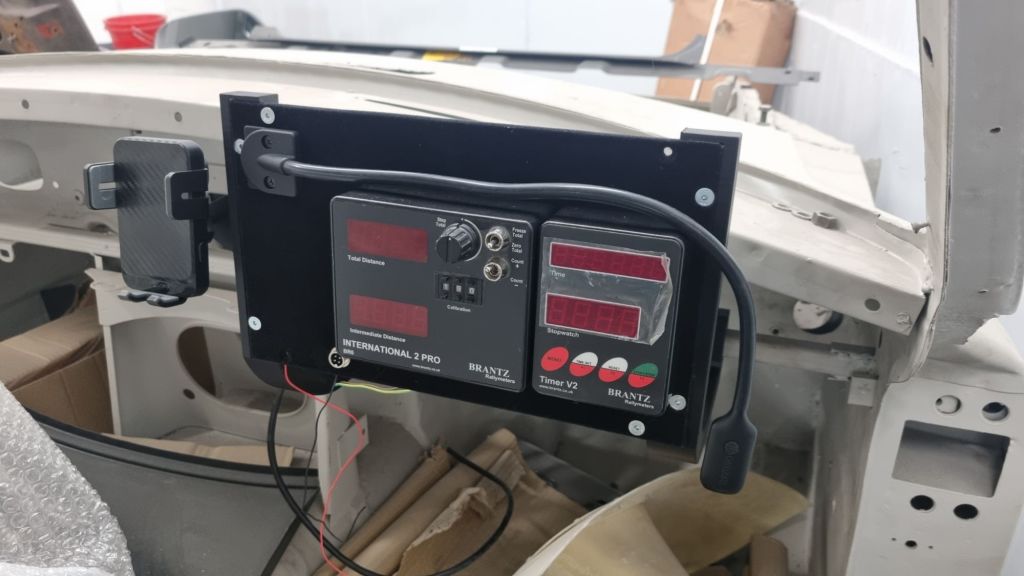
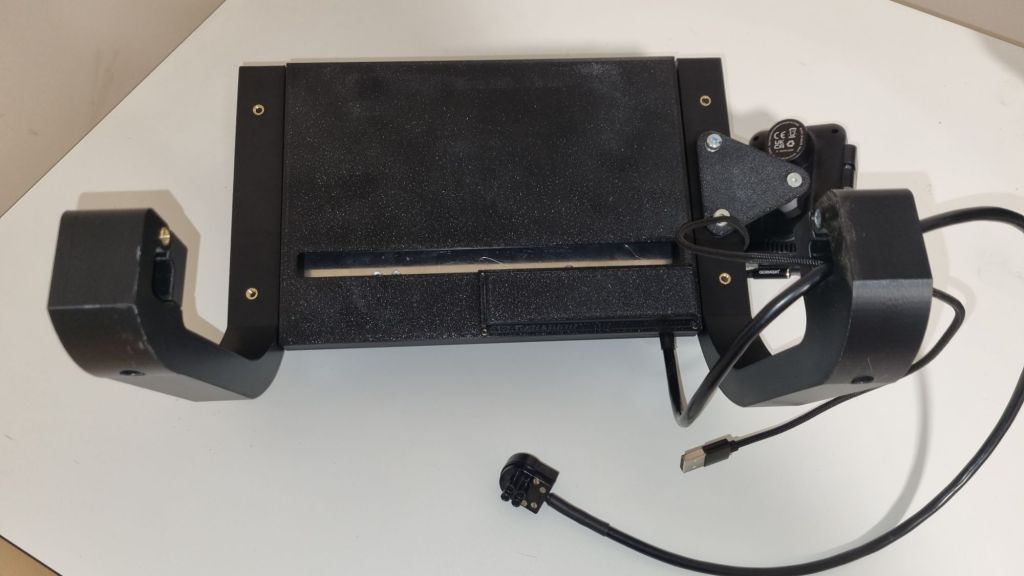
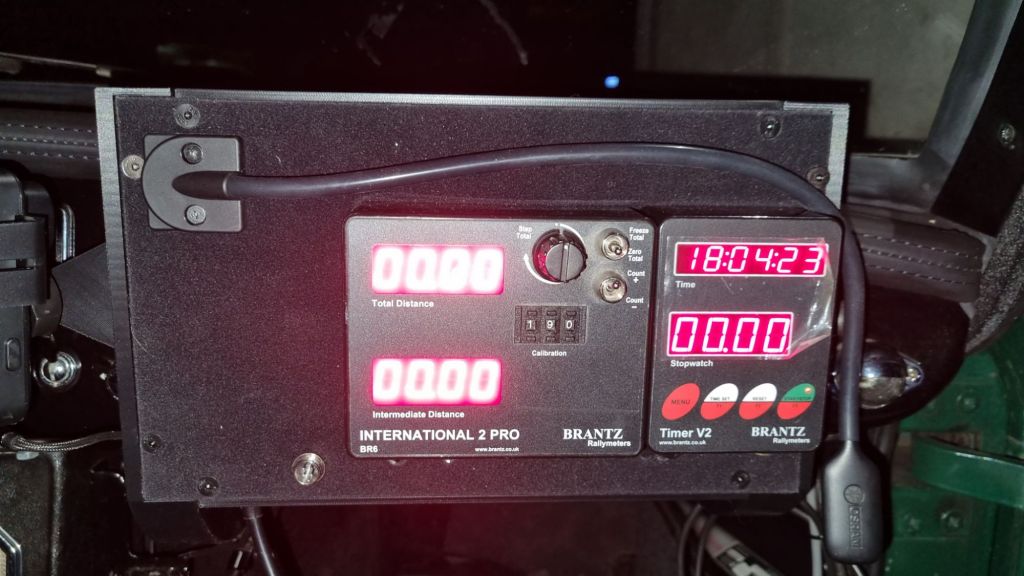
The holders also have additional threaded inserts on the back. This allows attaching further addon – like a simple mounting point for a mobile phone charger. This time I opted for a gripper with integrated wireless charger that automatically closes with a small servo. This looks very promising and will be tested out soon. The Brantz International Pro 2 and the Timer V2 are screwed onto an aluminium plate (300x175x3 mm) After much consideration I decided for this size as it large enough to all components – but just covers the glovebox lid. Also there was only one good position for the left holder clamp as the heater control cable otherwise interfere. As a matter of fact – for installation the lower control needs to be turned all the way in.
The flexible Osram maplight as well as the Brantz Timer V2 get power via the Brantz plug. This makes installing or removing the rally dash super simple. So far I only did a short test drive. Even though the holders have a snug fit – engine vibration and bad road conditions cause minimal wabble. This causes the right holder to touch the top dashboard mounting rail in those situations. A small rubber piece between the holder and the dashrail sorts this out. An additional holder that just serves as mounting point for the mobile phone charger is almost done.
Normally both Brantz unit have their own remote. I designed a box with two buttons. This is wires to an aviation type plug on the dash. Currently, I am unsure if I follow my orginial idea to just to velcro to attached it left to the Brantz. The alternative is a holder printed with TPU – a soft, rubber like material.


Leave a comment