ion")
It is freezing outside – too cold to enjoy working in the garage. Last year around Christmas I started to sort out the wiring harness for the Morgan. This took much longer than anticipated. On the plus side I learned to love the old BSAU7 wiring standard. If you followed my blog, you might remember that I bought a new loom for the Morgan that I had to change quite a bit. For the most part this was caused by the fact that Morgan made changes in their wiring that were never accurately reflected in the documentation.
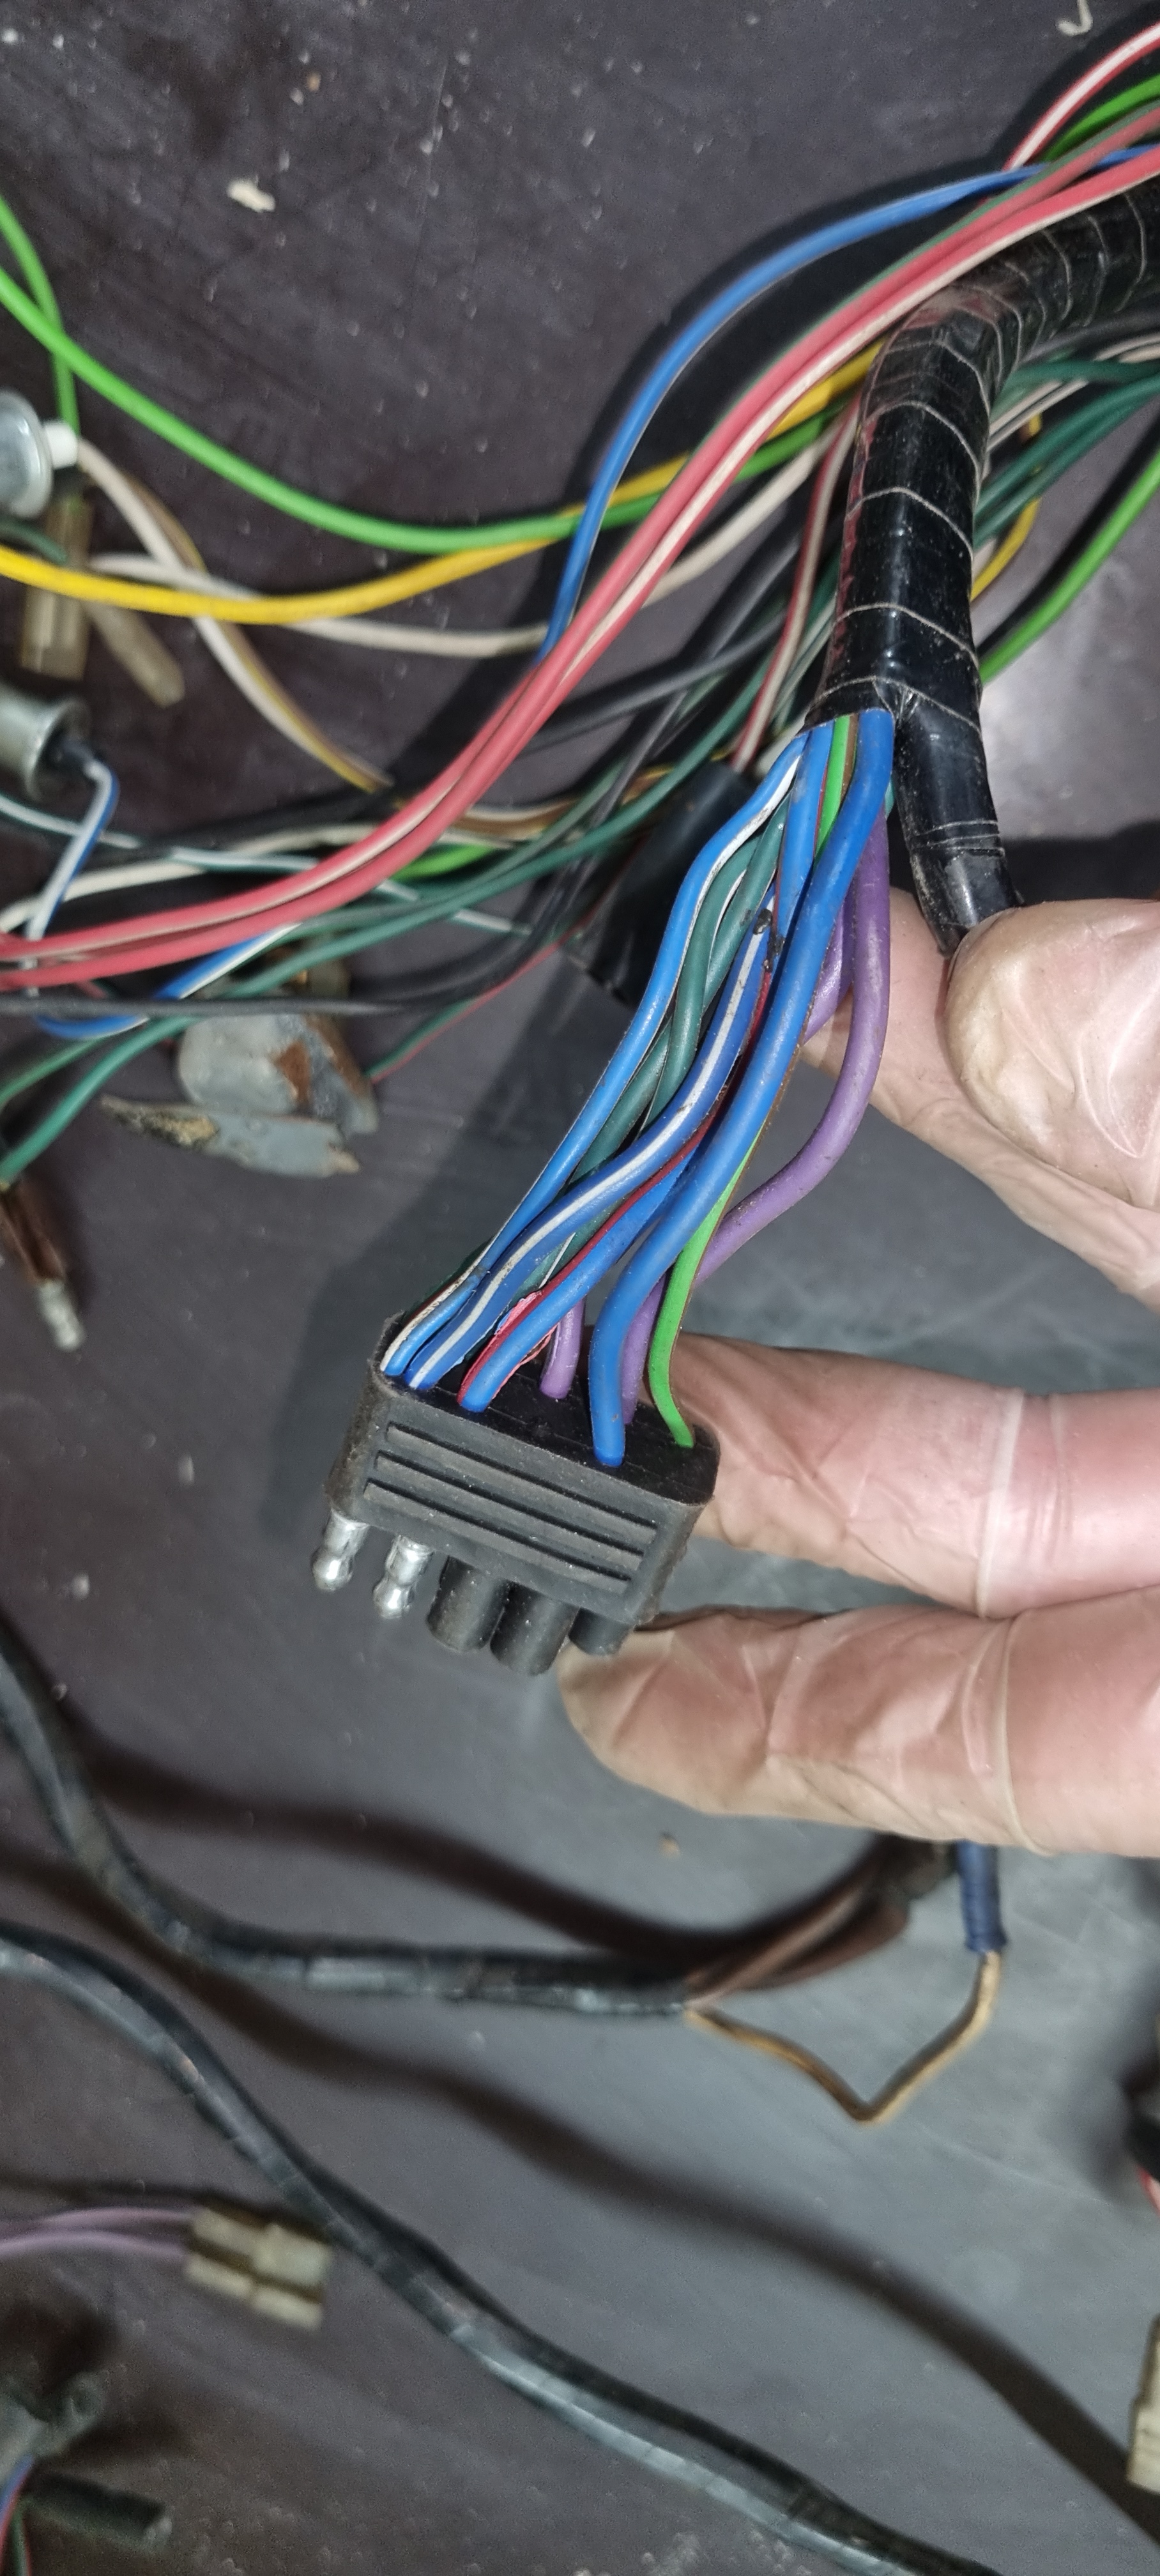
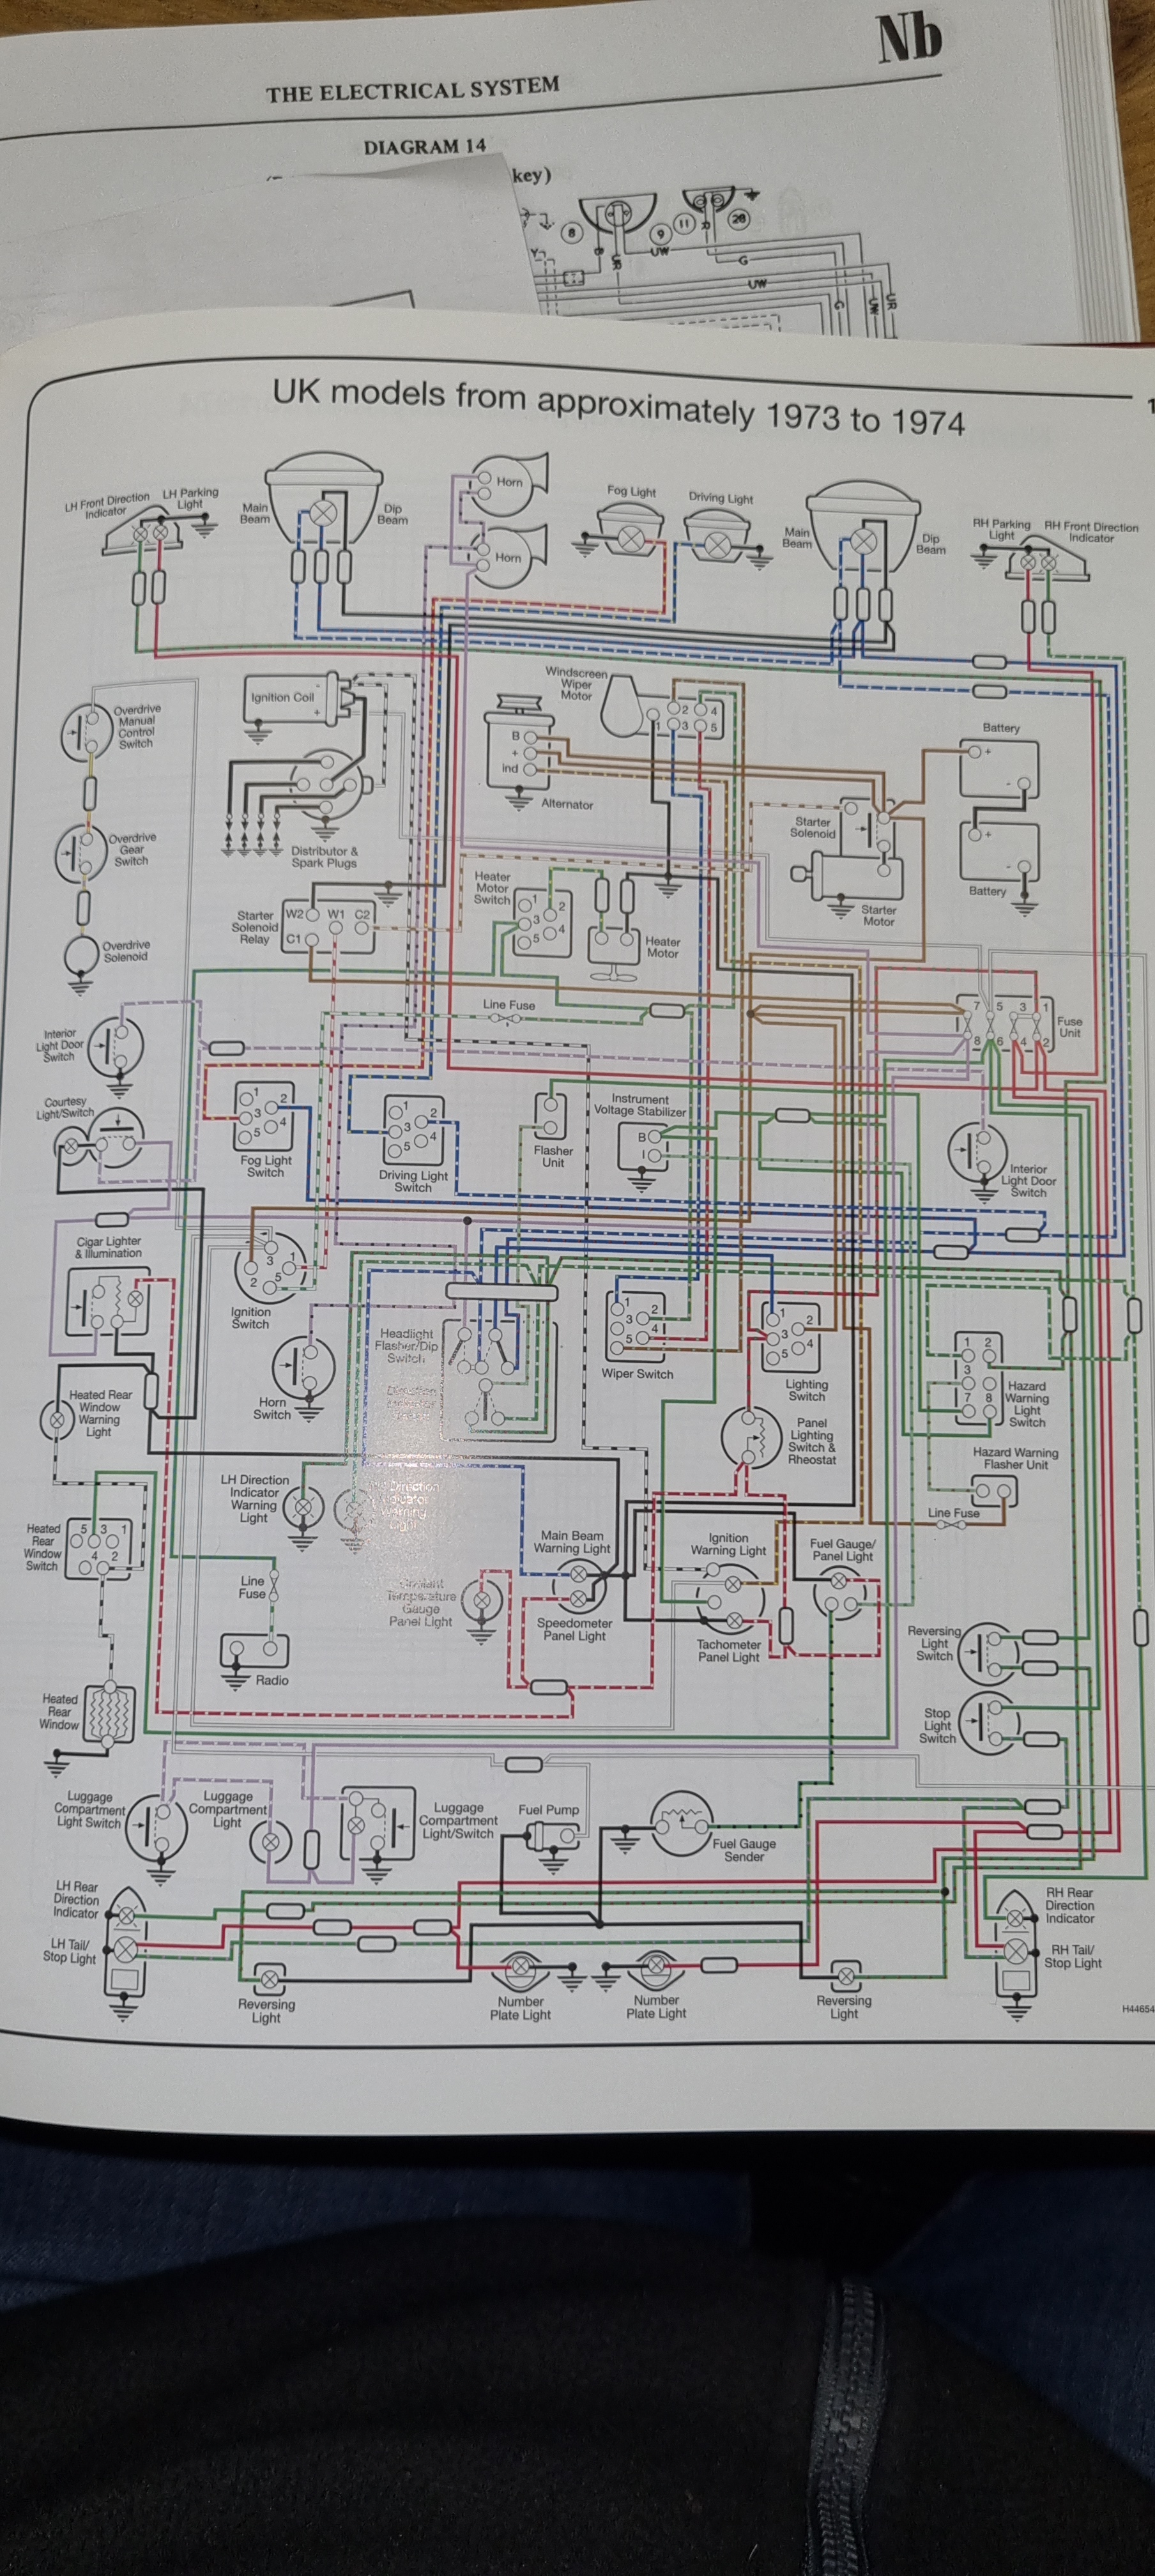
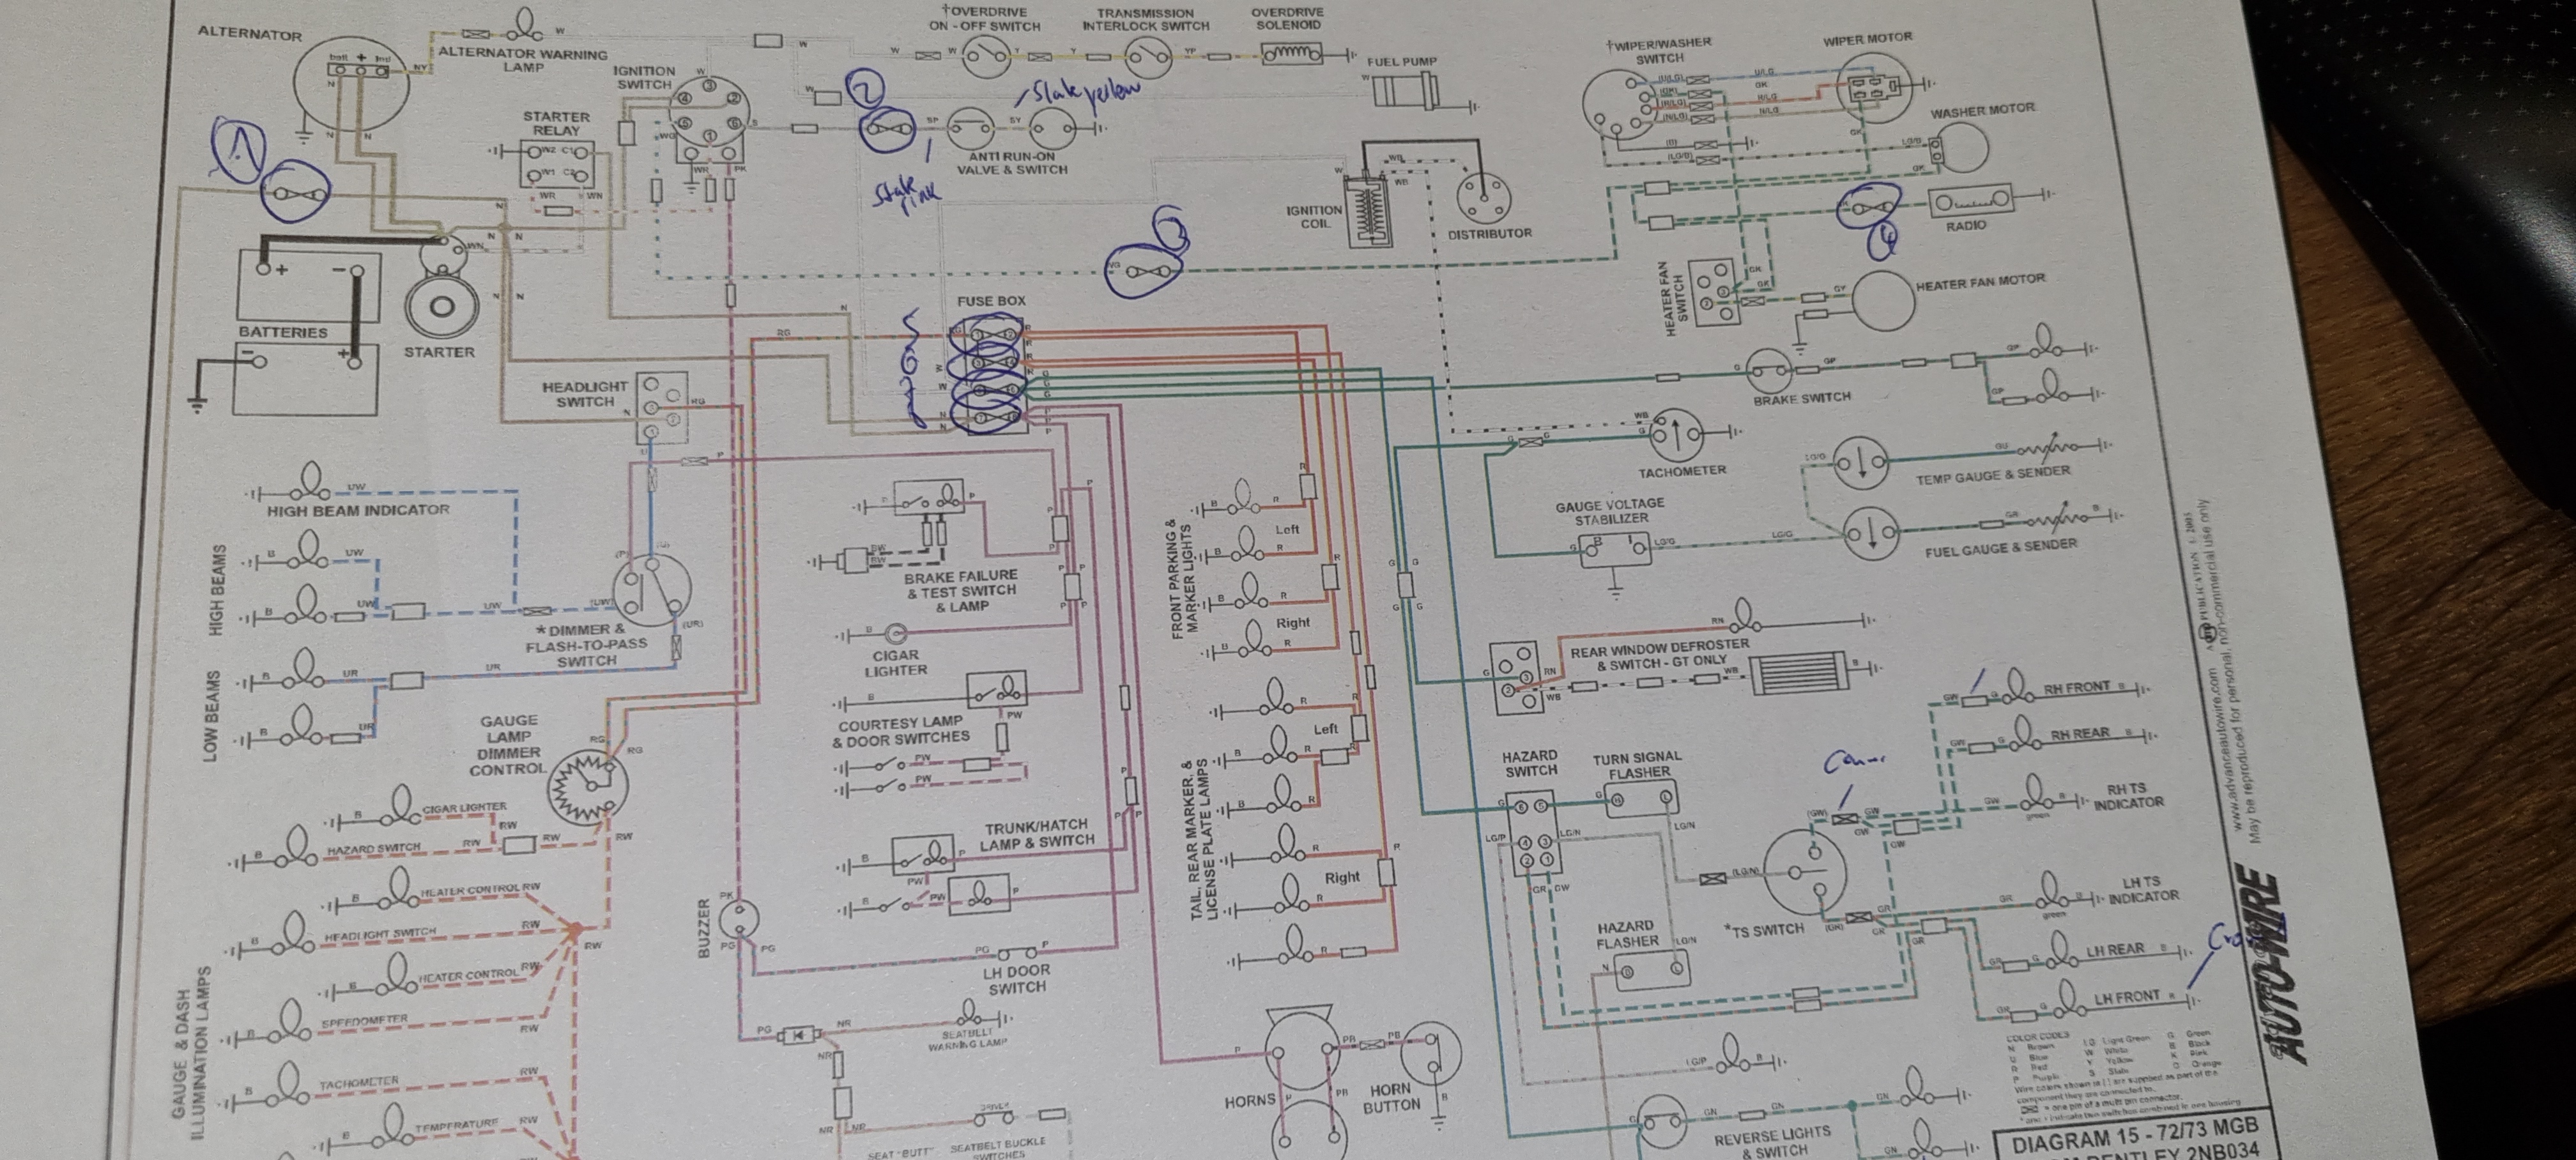
For the MGB my plan is to check, rebuild and upgrade the old harness. This first step is to read and understand the wiring diagram. And for the MGB I have three different versions for the UK+EU models. The Haynes Owners Workshop manual has an easy to read, colored plan for UK models from 1973/1974 on page 189. The Leyland Workshop manual includes a plan in black & white. Finally, I have some copies of the Bentley diagrams which are recommended in forums.
There are some slight differences in the plans. Each variant has some benefits and drawbacks. For example, the Bentley version does not show a hazard switch in the UK plan. However, the Bentley diagrams are almost beautiful in their simplicity. They show the logic behind the entire wiring construct. But separating the parts of the loom is more difficult with them. In the Leyland variant in B/W it is much easier to recognize the front and rear part of the harness. A huge benefit is that each cable is labeled with its color. On the other diagrams it is hard (impossible) to distinguish green and light green. The Haynes version lets you easily detect where a cable should be relative to the position of an item in the car.
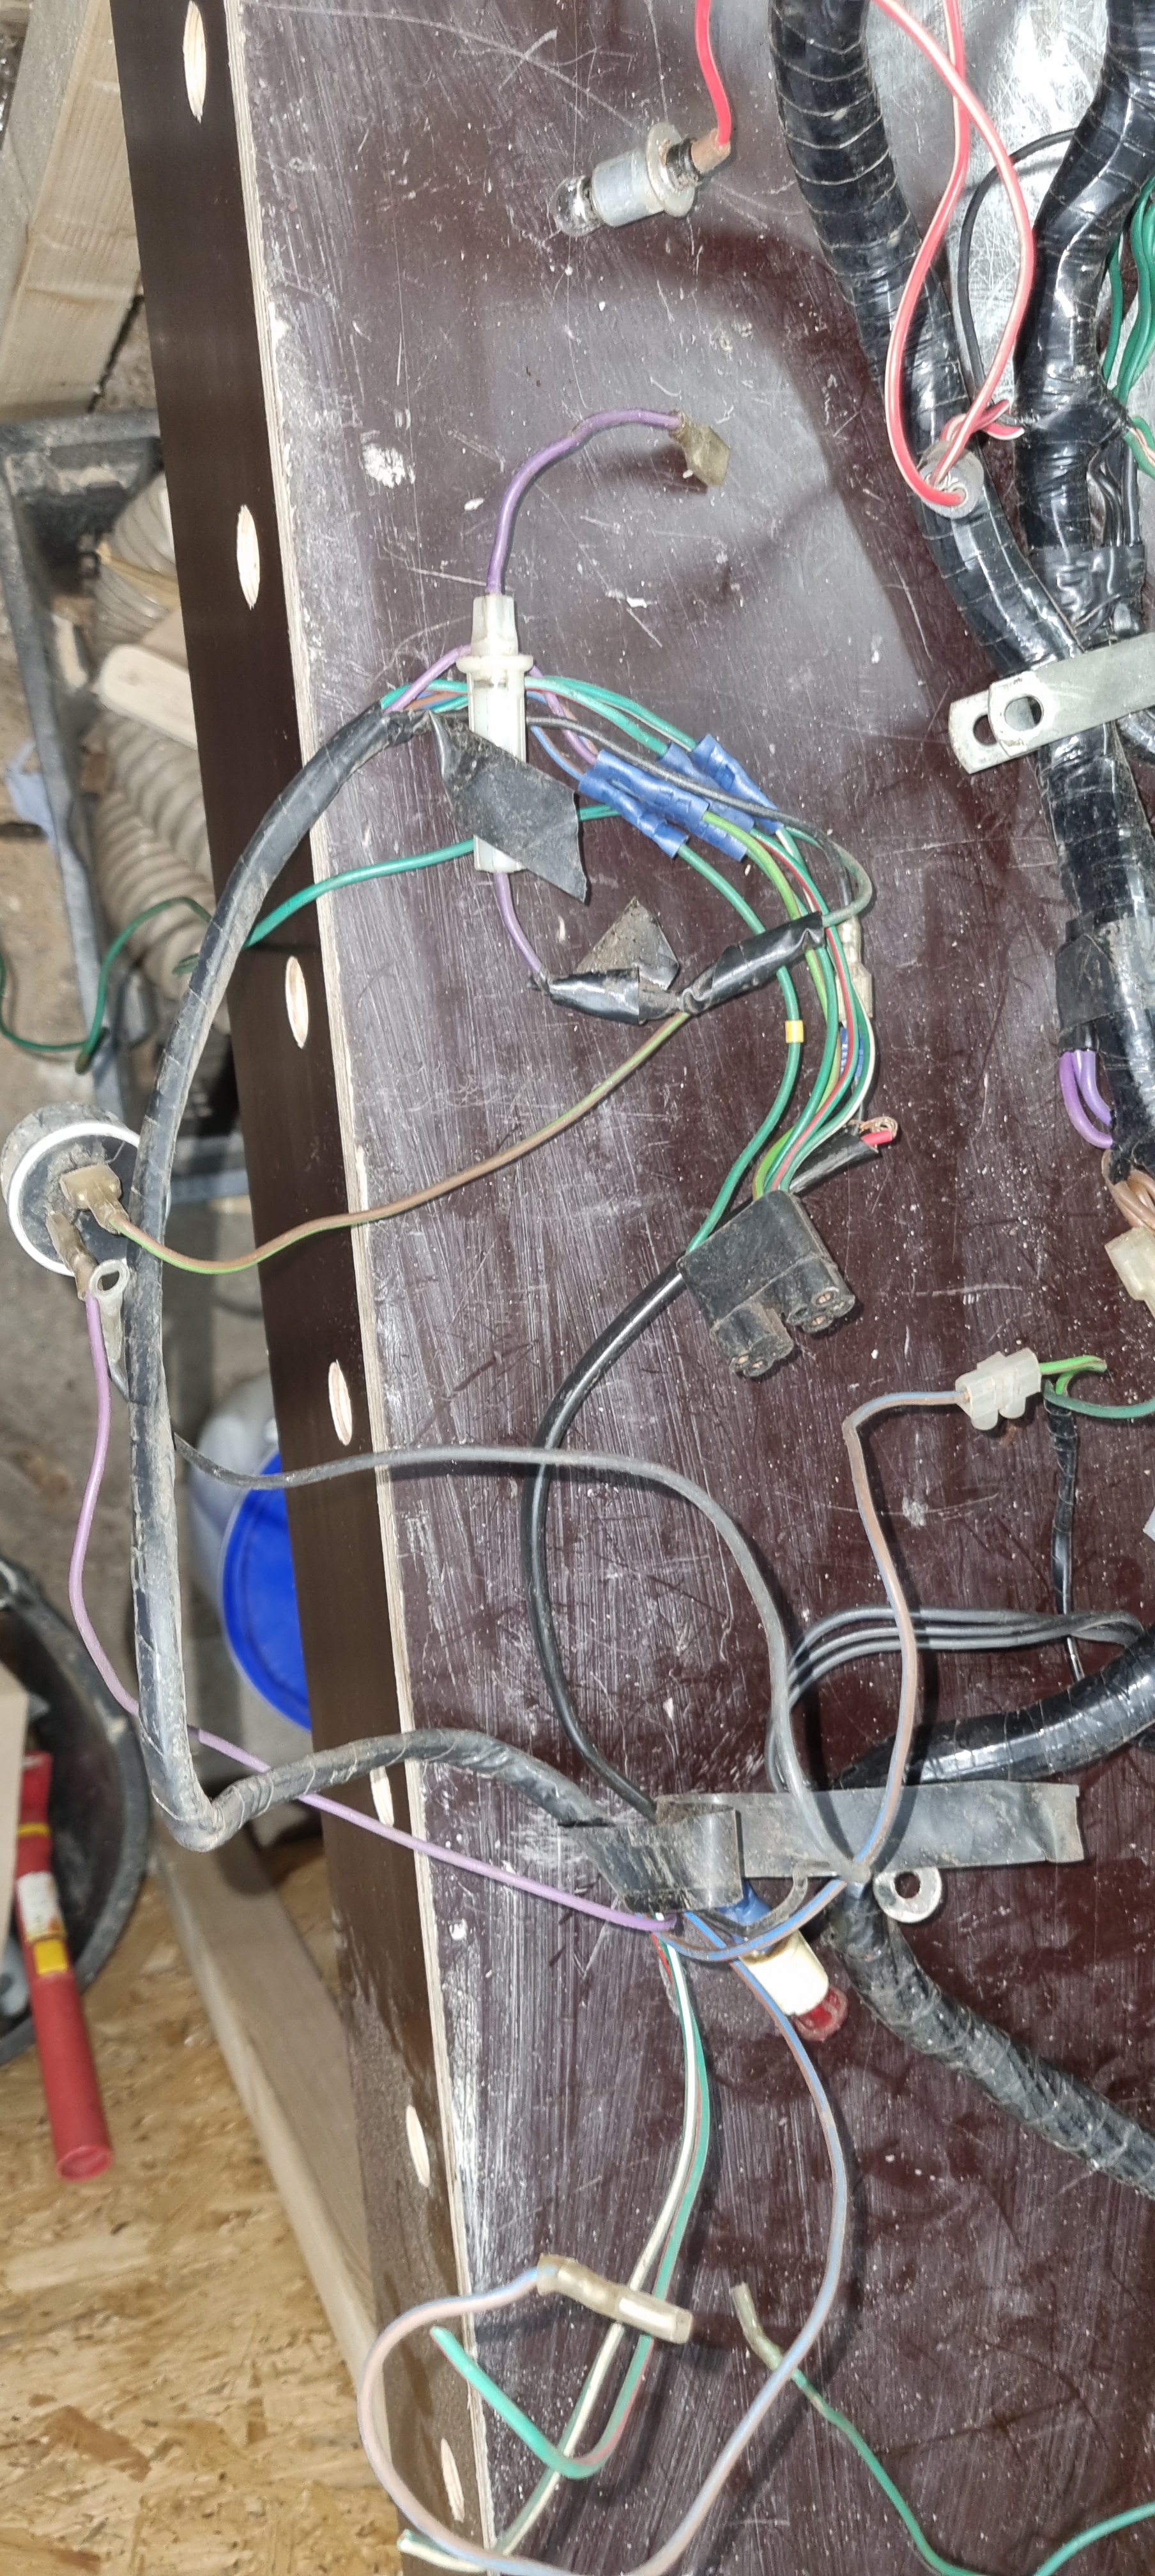
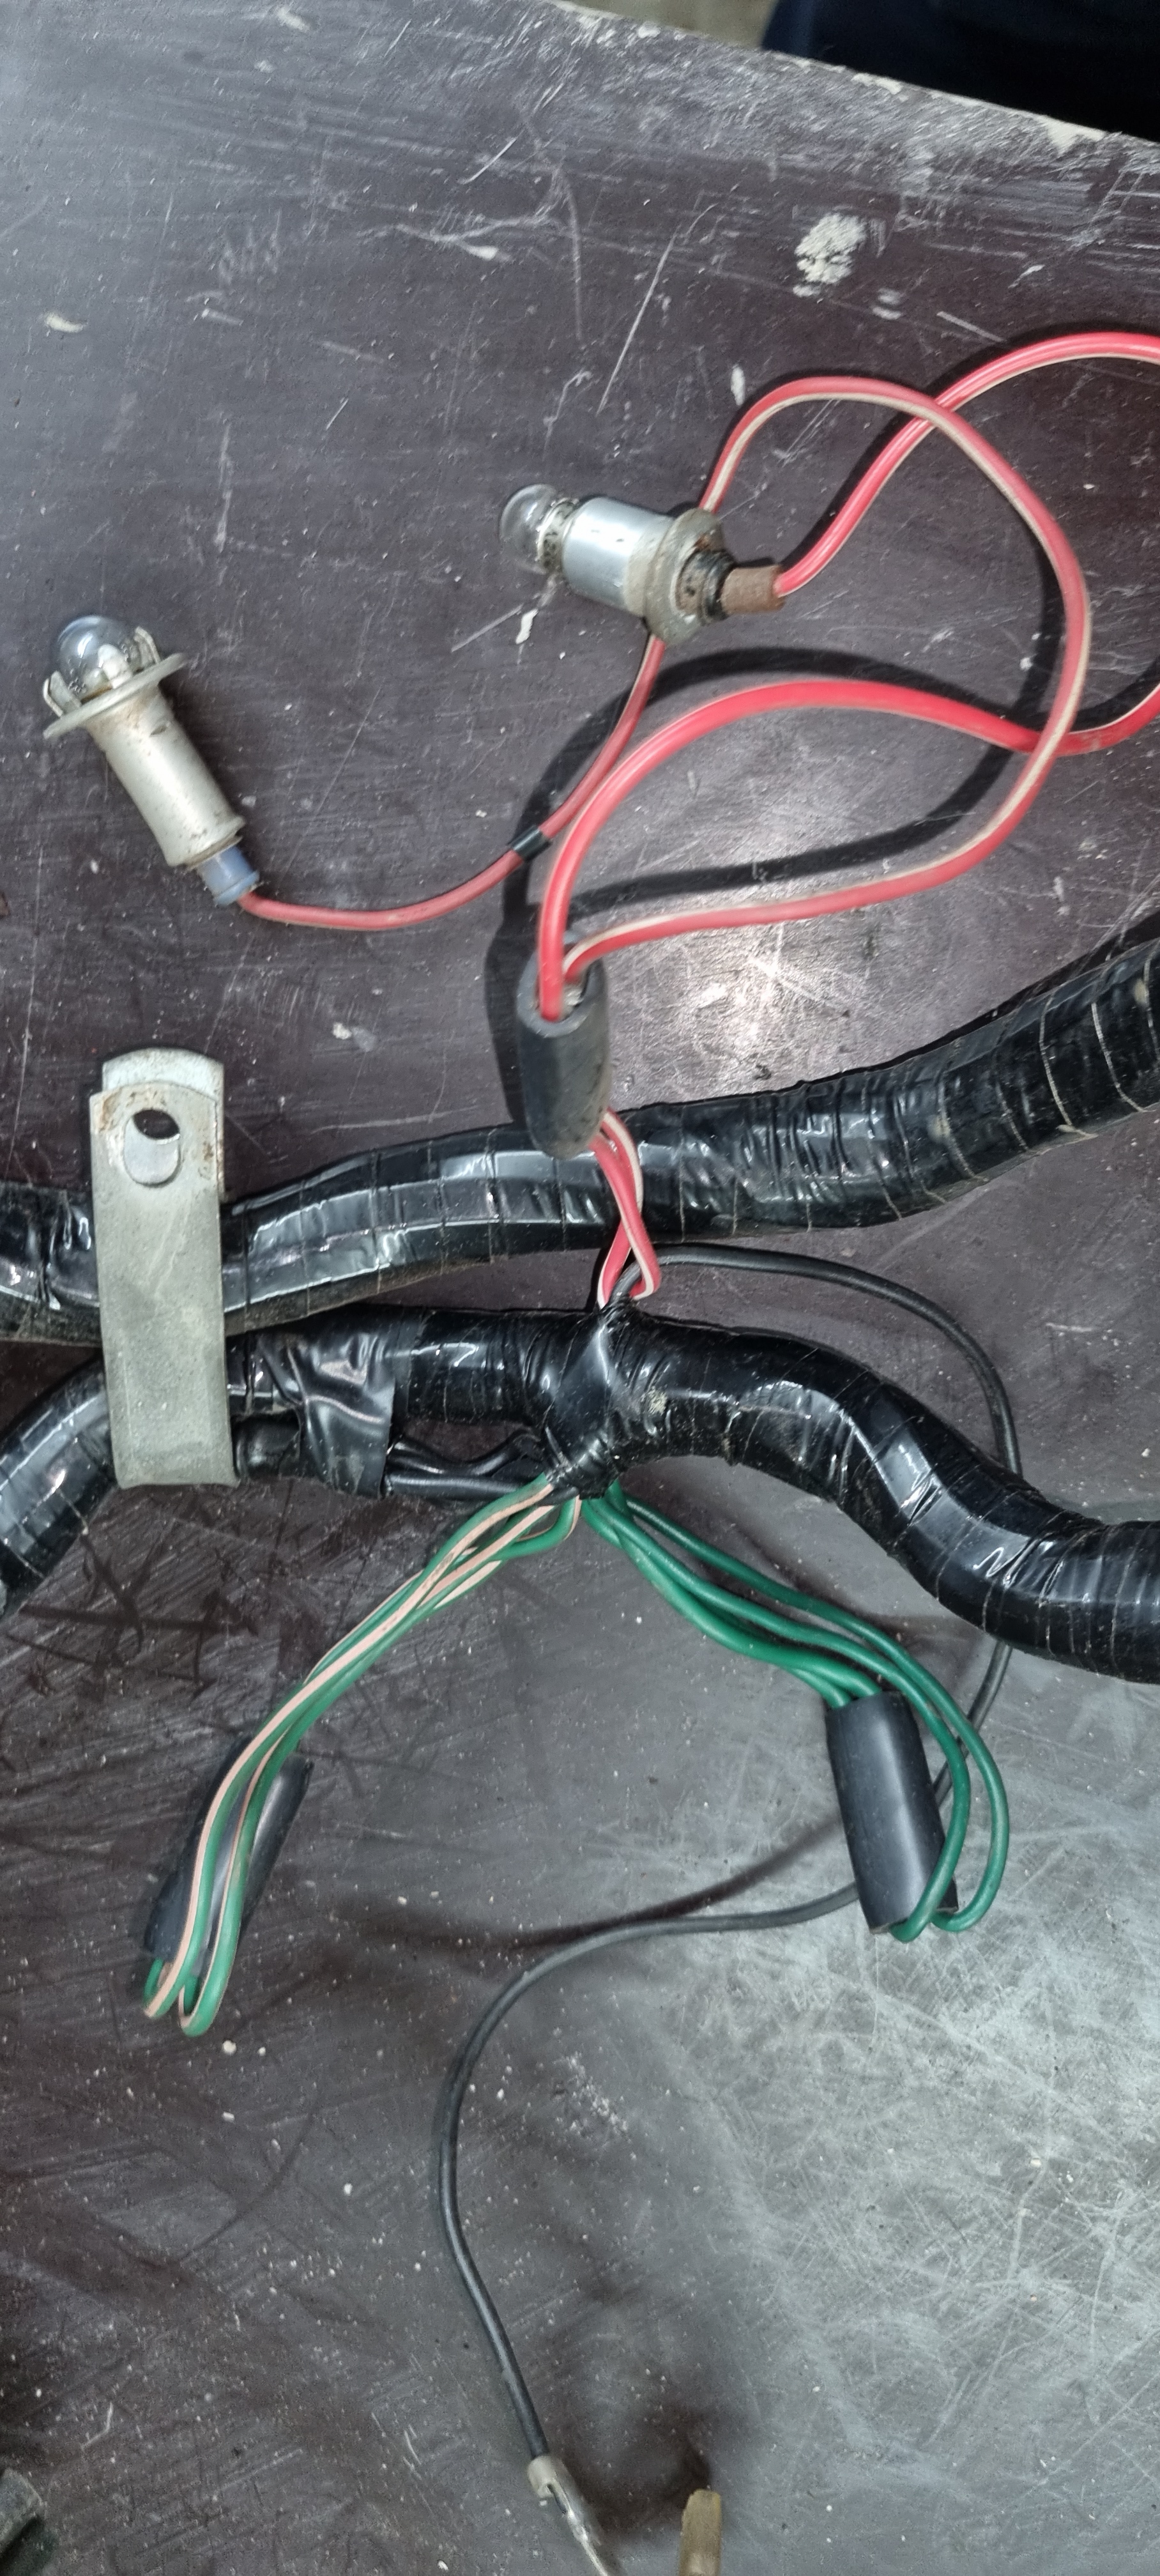
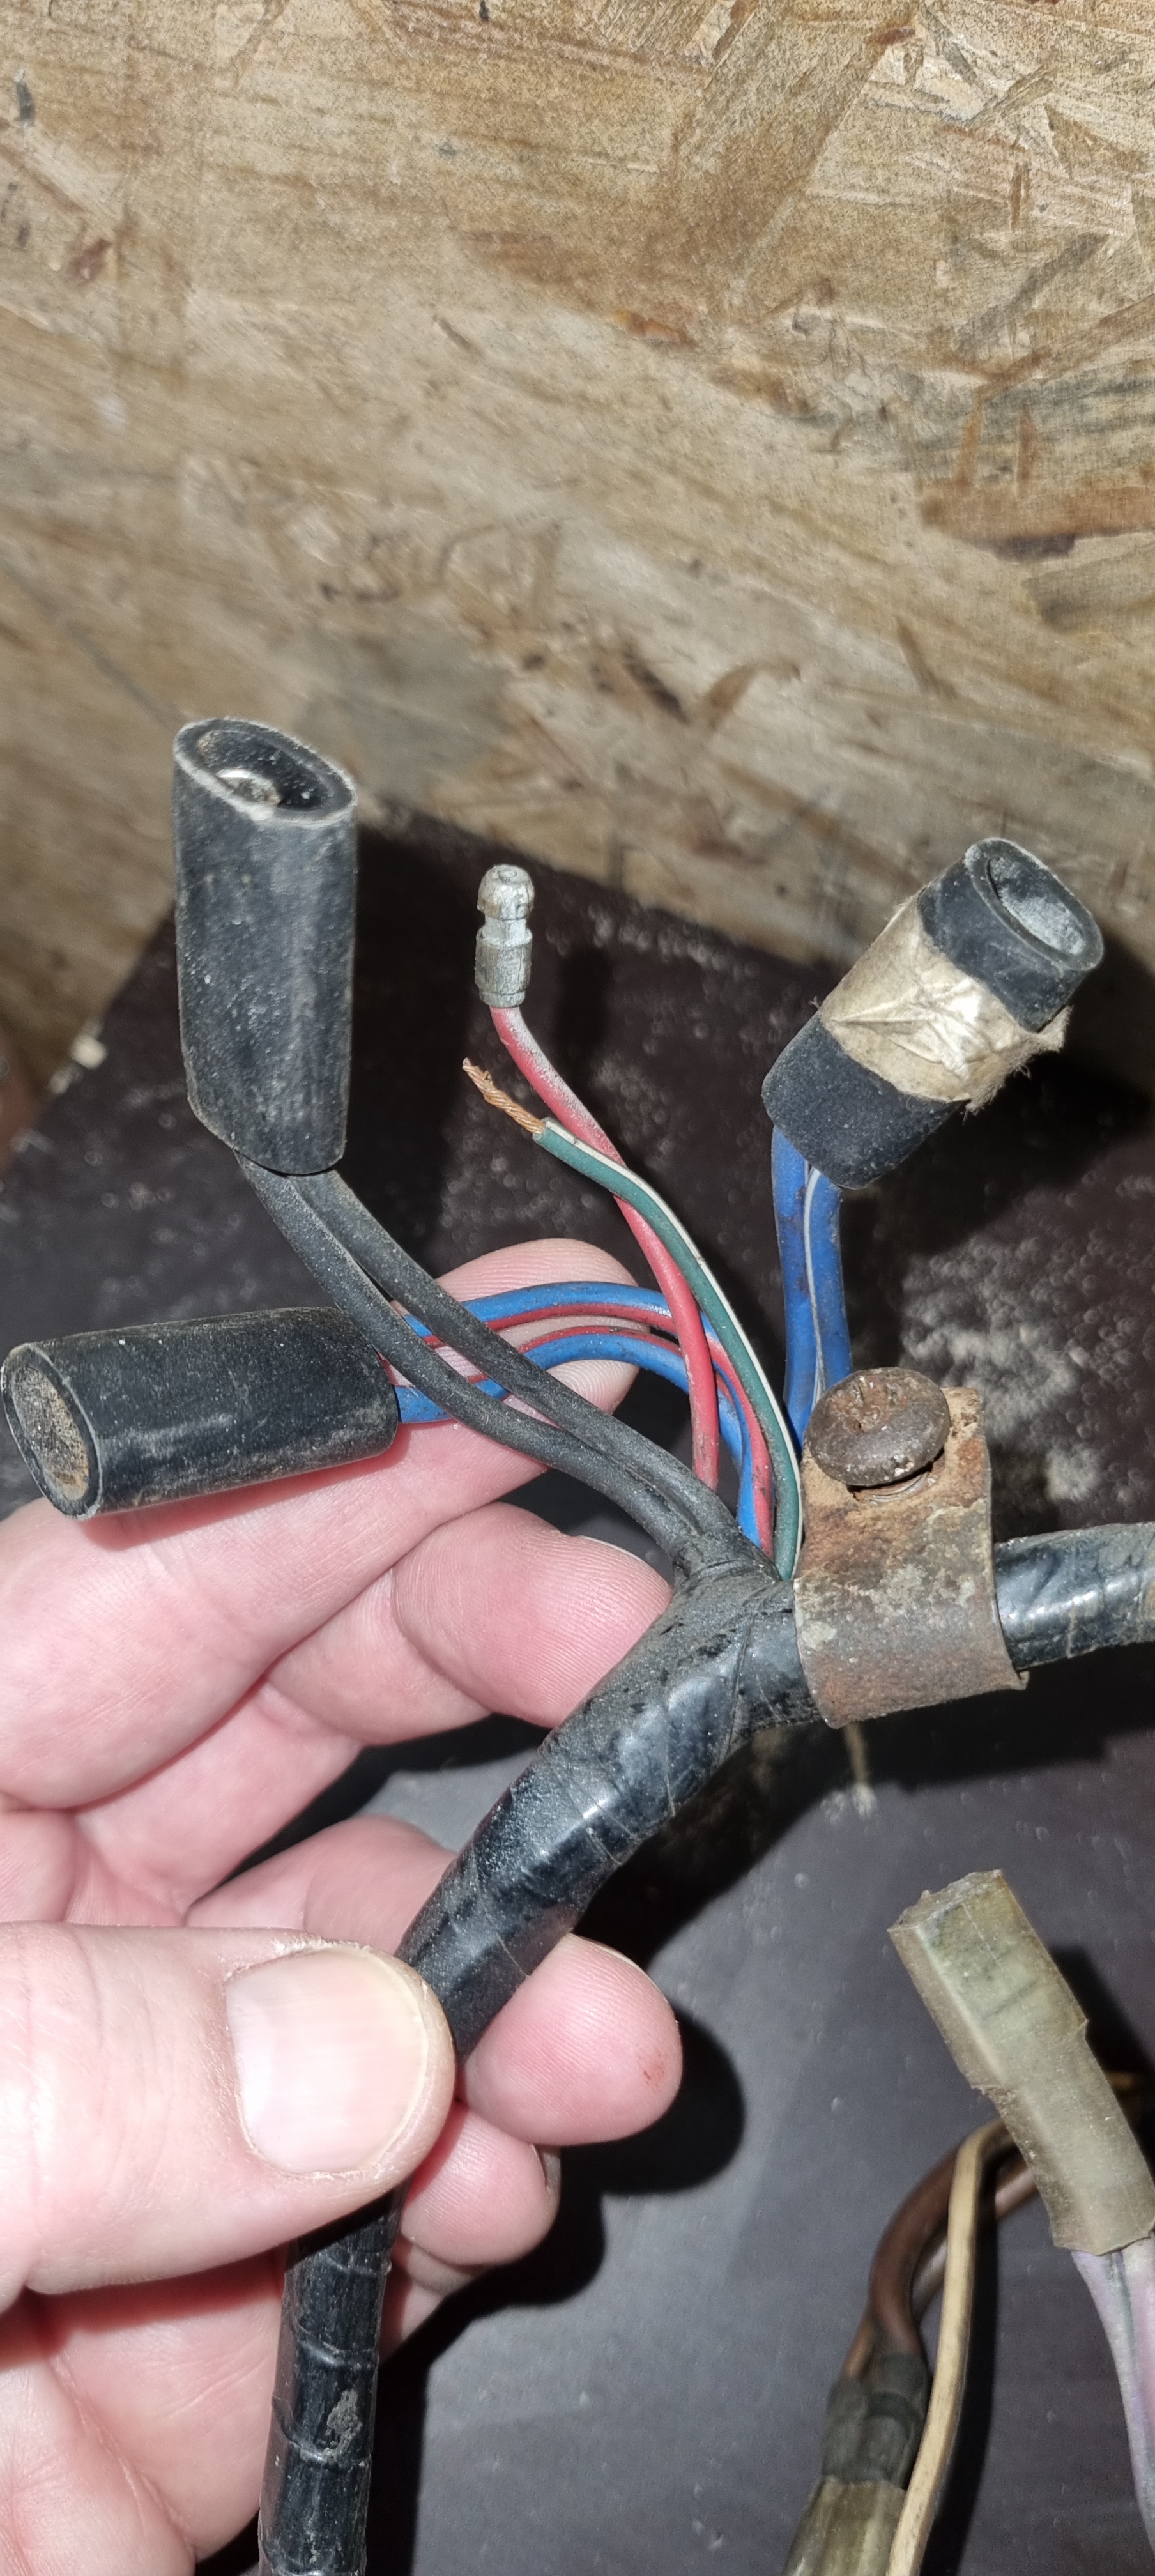
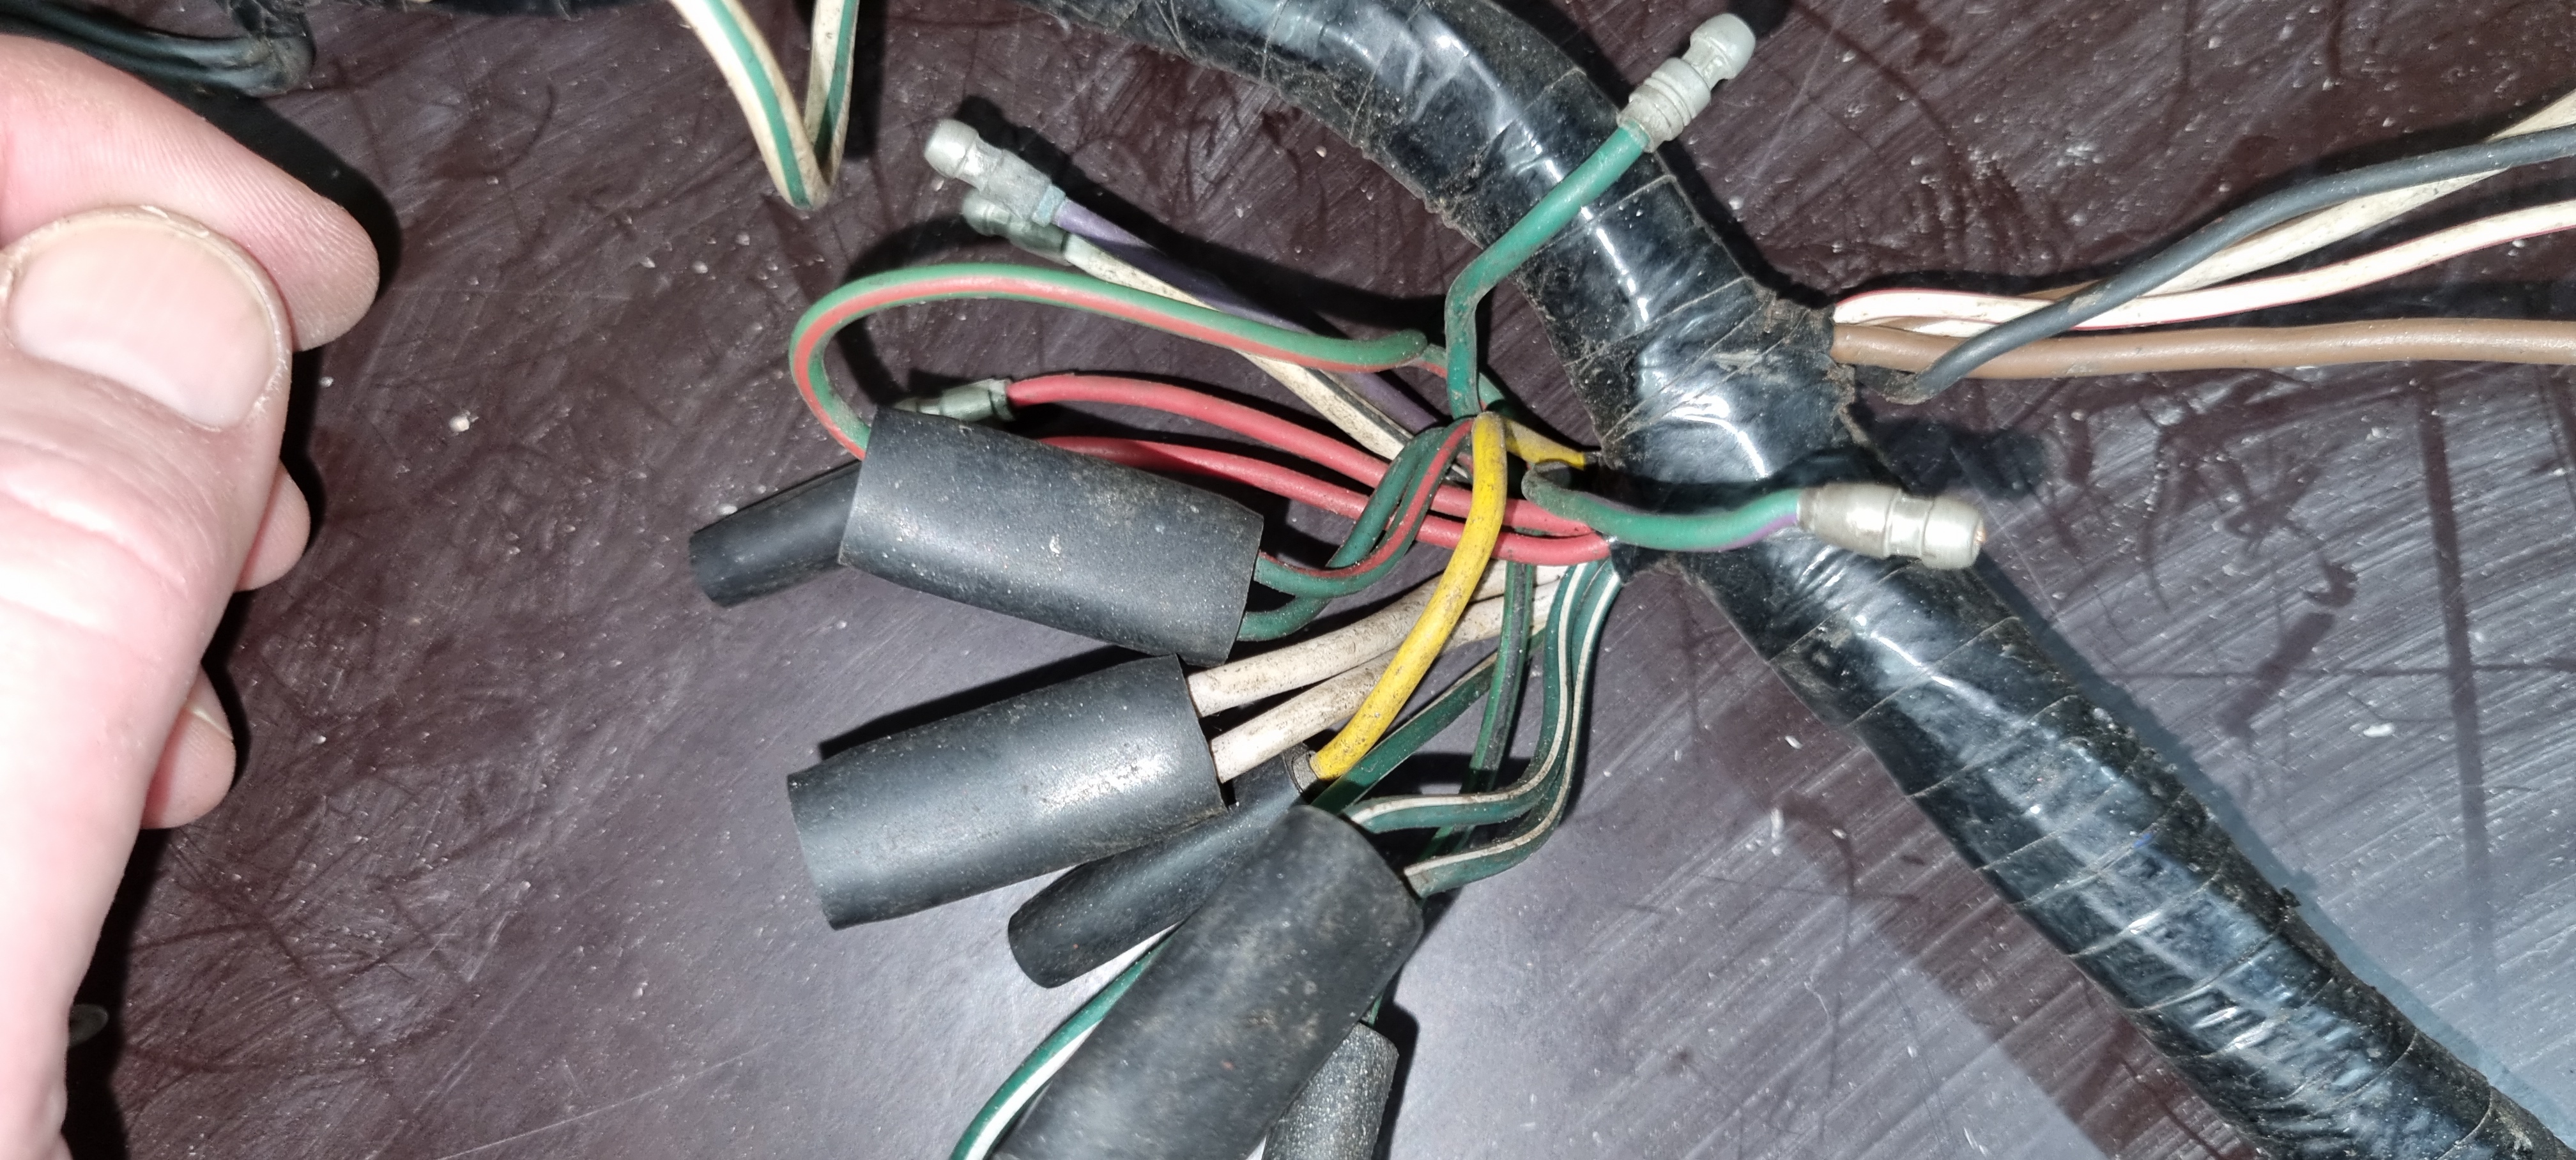
My starting point for the checkup are all fuses. Like many other British cars of this period the MGB used the old trusty Lucas 7FJ fuses box with 4 fuses. But these are not the only fuses in an MGB. There are a few more inline fuses. From my experience checking all of those is already a good indicator on what previous owners have done with the wiring in the past. Very often hazard switches, radios and fog lights have been added to a car in that past. And along with this – people either attached to existing fuses or added a few themselves. This was also the case with Mildred. The hazard switch cables were cut and rewired at some point. The old socket for the original switch was moved behind the dash and the inline fuse for it was missing.
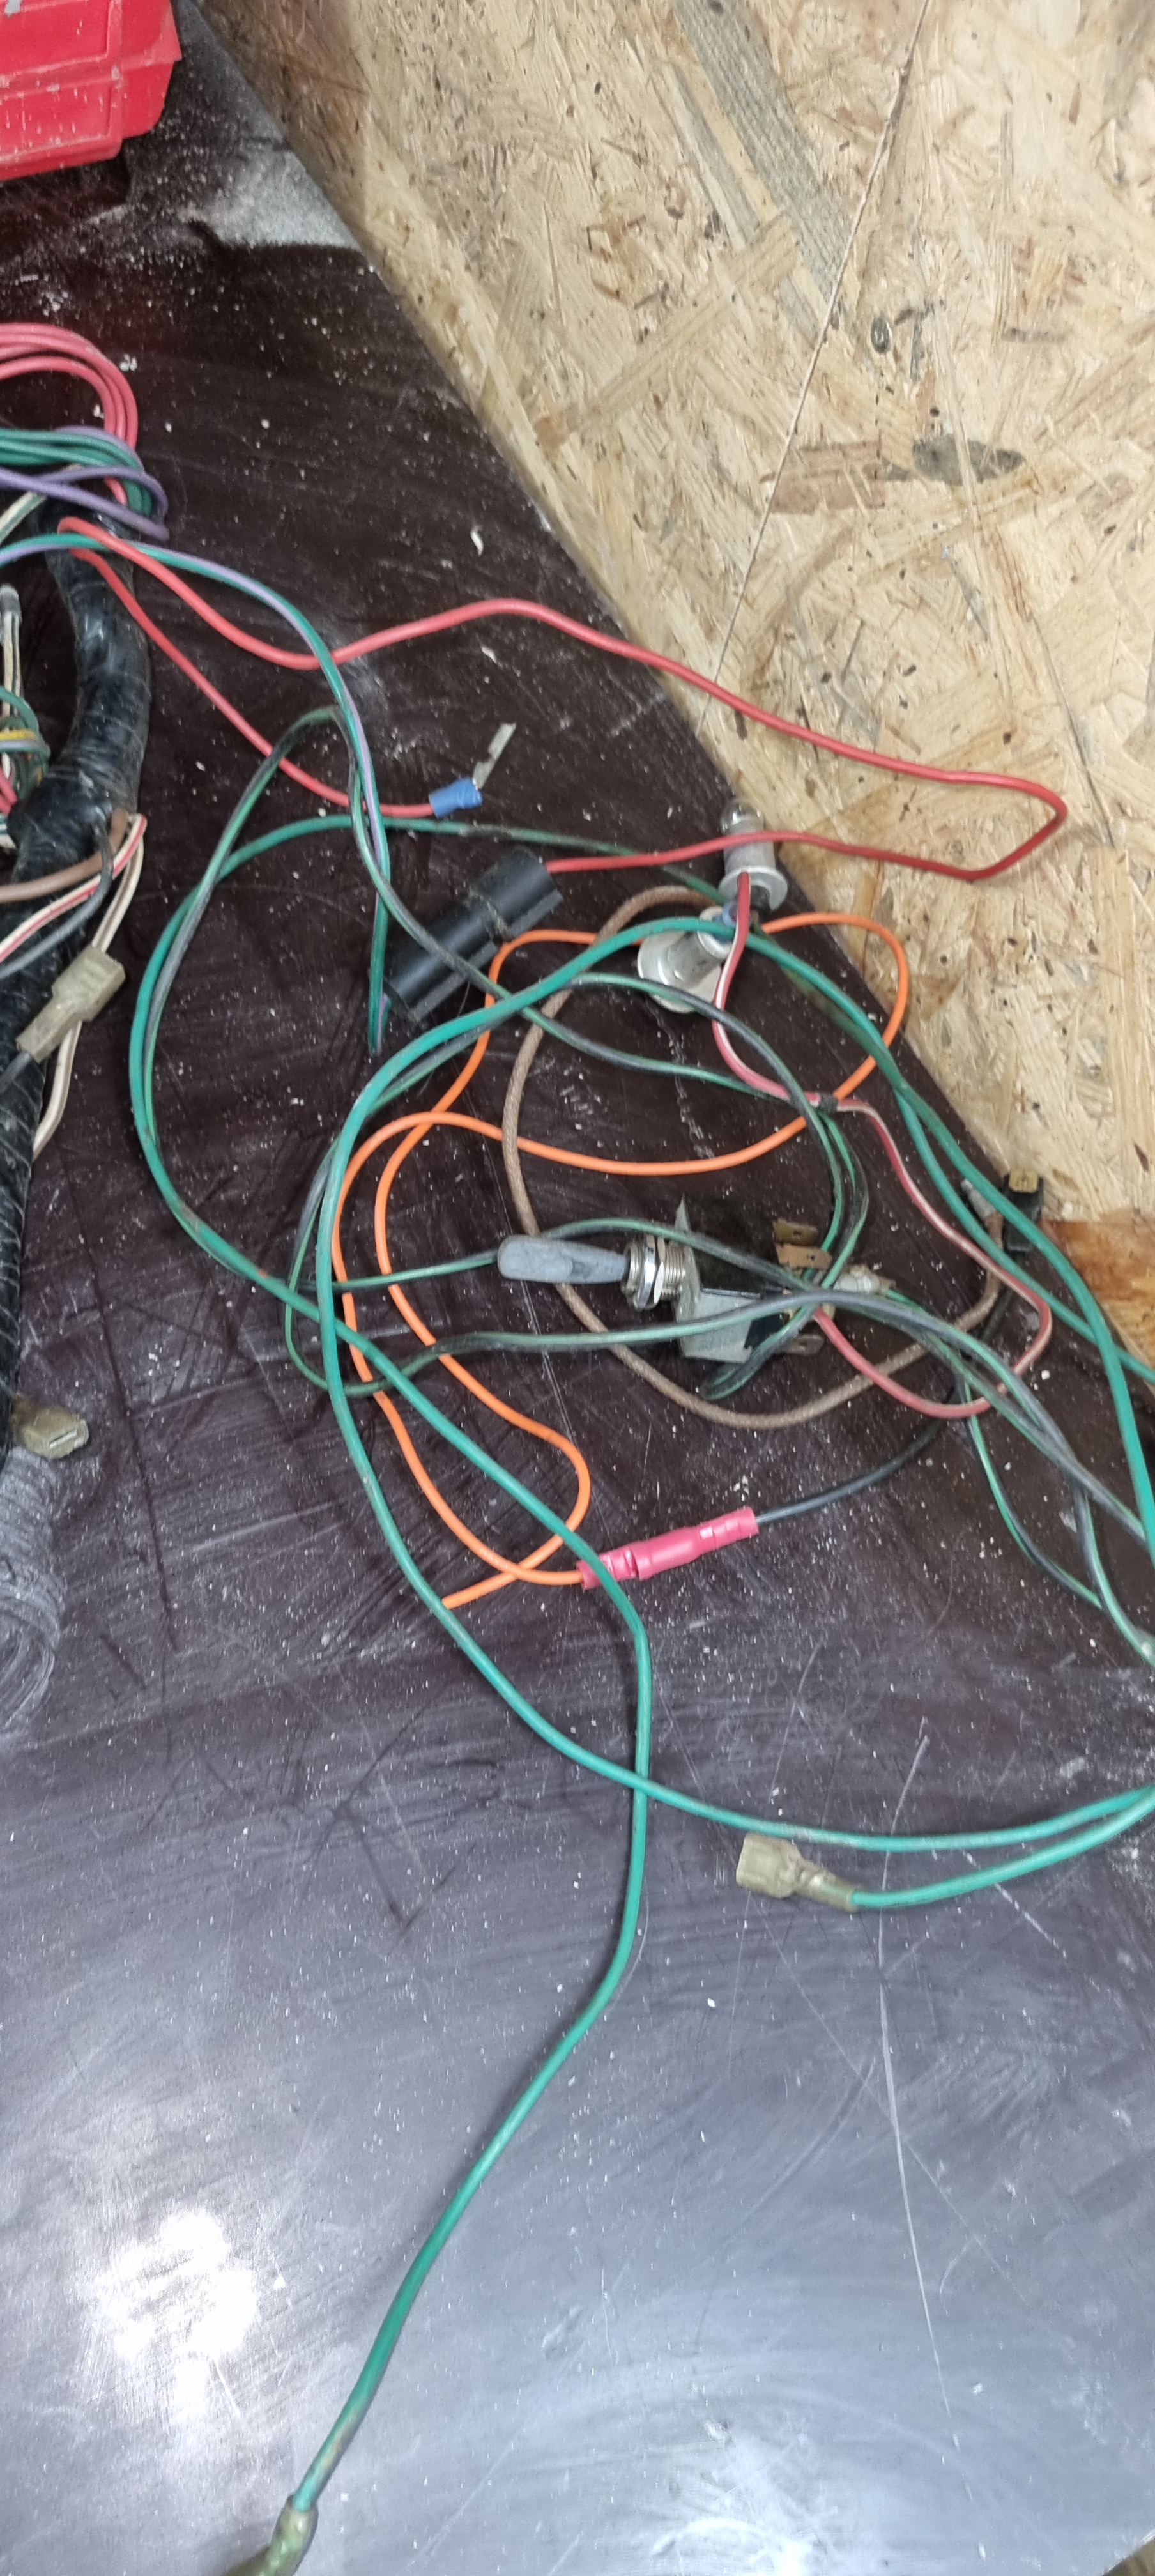
The next step was to remove everything that was added to the main front wiring harness. To my surprise this was not a lot. After testing all cables with a Multimeter and could not find any faulty connections. Overall, the condition of the loom is much better than I anticipated. Next step is to order everything that will get connected to the loom later. And the list of modifications has become long over the last couple days. I will go into the reasons for this at a later point but right now this is planned:
- bigger fuse box with relays (this one will be tested first)
- Fog lights (red-yellow cable and relay)
- Revotec fan (add switch, relay and black-green cable to existing wiring)
- Oil pressure warning light (white-brown cable)
- variable heater speed (lightgreen-green? )
- Temperature cable (green/blue)
- Inertia switch plus bypass (white + white/purple)
- 123 ignition
- Brantz sensor (I hope to be able to fit the BR4 sensor)
- Aux port usb (added fuse)
- Radio/Bluetooth (additional fuse)
- Speaker cable
- Electric speedo (black-yellow cable)
- Additional interior lights
- Central locking (very unsure about this one)
- Electric windows (a bit unsure about this one)
- Heated windscreen (relay + purple-light green)
- Heated seats
- EZ powersteering (30A fuse and cable additional brown feed cable)
- Courtesy light trunk
- Aux/USB trunk box
- Battery cutoff
- hidden Tracking device with battery
Some of these potential modifications are not everyone’s cup of tea. And I might not do all of those – only the ones I marked in bold are already set. Nevertheless, the plan is to prepare the loom for all of these options.


Hi Tim,
just some comments: always have good/ solid ground connections in mind. A common fault/ defect with Bs of the 70ies. I’m using since long the wiring diagram from advanced autowires (download). Printed out in colors and laminated :-).
As long as the cooling system is ‚clean‘ a B will not be in need of a Revotec fan. However there is a strong recommendation: don’t change to the electric water temperature gauge. The old version with the capilar is working correctly , the electric one is nicknamed ‚Schätzeisen‘.
Whether or not you need a heated windscreen I would not comment. However to improve the heating and fresh air system towards the windscreen does really make sense.
If not already done a change to one 12V batterie is a real step forward.
All the best Andreas
LikeLike
Hi Andreas,
good points. One difference from the Morgan loom (which is similar in terms of connections) which I will add is ground cables to the head- and fog lights. Not that these are required for the MGB but having them in place for “peace-of-mind” is a plus.
My plan is to keep the classic Smith dual water/oil pressure gauge. But like with some other changes to the wiring: having a new, additional cable in the loom for an electric temperature gauge just for redundancy cannot hurt.
Same applies to the heated windscreen. Maggie (my 1967 GT) was upgraded to a heated windscreen. Is it required? No not really – it highly depends on how the car is used. Most people will not drive their classic car in harsh weather conditions. But especially on my trips to the UK, early morning drives or rainy days it is great to have. I will add the required wiring, fuse and relay (similar to the kit you find at Moss). If Mildred will become a more “daily driver” it will be a “simple” 😉 windscreen change.
And yes – a 12V battery change will be done.
regards
Tim
LikeLike
Hi Tim,
well understood.
In regard to the battery cut-off there are (at least) 2 ’solutions‘: the NATO type or -my preference- the LUCAS Healey style one.
I’m curious to learn about your ’new‘ fuse box. Wait and see….
I already cross finger right now for ‚your‘ windscreen installation – especially the chrome strips.
Best regards Andreas
LikeLike
This is the battery cut-off switch I have ordered: https://www.moss-europe.co.uk/battery-cut-off-switch-lucas-type-short-knob-1b2804.html
The new fuse box just arrived – it will require a mod of the mounting bracket, but I believe it will look quite good when it’s finished.
So far, I have installed two Mini windscreens and assisted on one MGB GT. Yes, especially the chrome strips are a challenge. We didn’t have the right tool at the time – I hope these will be available soon again. https://www.moss-europe.co.uk/windscreen-installation-tool-set-mtr481101.html
LikeLike