
Smooth. This is the one-word summary of the rear axle swap. Something that does not really apply to the tasks when I fiddle around in the garage. It certainly helped to have done this before. Back in late 2019 I helped a friend to replace the axle of his MGB roadster. And of course, when I disassembled Mildred in 2021, I removed another axle. Compared to the struggles we had with the roadster on the car lift – it might even be the best way to do this with the car just on jack-stands.
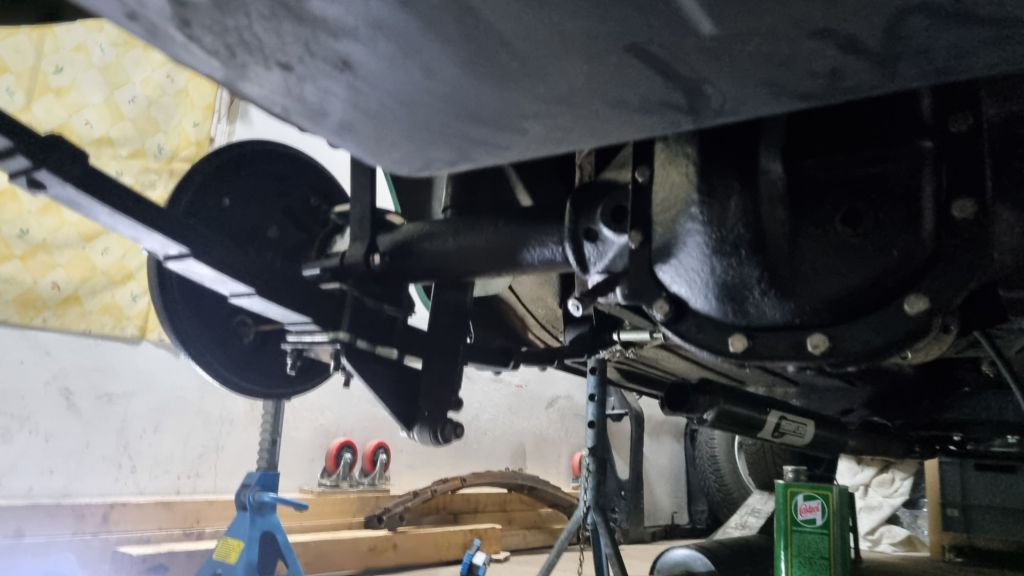
Steps involved were the following: jacked up the car and put the jack stands just before the rear leaf spring mounting. This part is a bit stronger and can hold the weight of the car. As I needed some room in my small garage, I removed the wheels – maybe it is possible to leave them on and roll the entire axle out later – might be an idea. Disconnecting the handbrake cable, brake line (flex piece screwed to battery box) and panhard on chassis side (specific to my car) just took a few minutes. The four bolts from the driveshaft were next. Axle-straps would be the last to remove – Maggie did not have any. With the jack underneath the rear axle (positioned just before the lower oil screw) I undid the rear leaf spring shackles. The one close to the fuel tank takes a bit more time to undo but is not a big hurdle.
At this point you can lower the jack and the entire rear axle onto additional axle stand. The last step is to take off the bolts on from the front of the leaf springs. When the axle is entirely free – remove the axle jacks stands, lower the axle carefully and you can pull it out. Easy. The axle I removed is leaking oil through the front oil seal. It also needs “declonking”. Other than this it is in a excellent condition. After a first clean up, I also found the rear axle number and it matches the BMH Heritage certificate. Awesome!! With this, there is no question – it will go back onto Maggie once I have Mildred ready.
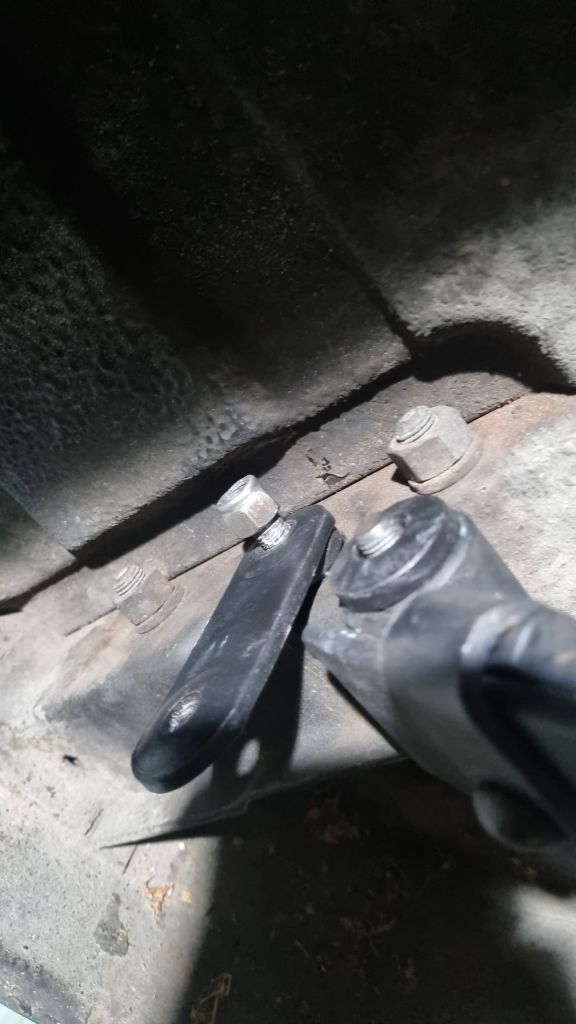
One thing I also noticed is that I incorrectly bend the brake lines on the axle I prepared. It was simple to correct this by using the original brake lines as pattern.
Speaking of assembly – I took a different approach of getting it back in. On the MGB roadster we had the entire rear-axle including leaf-springs bolted together. The front bolts went in easy – but I remember it took us forever to attach the rear axle shackles. This is the reason I decided to test another approach. Instead of bolting the new leaf springs to the axle – I attached the front to the body mounting points. Then I moved the new axle in place with the jack and put it on the highest position I could on my axle stands. This gave me enough room to attach the shackles quite easily. Well, to be honest – the one close to the fuel tank took 20 minutes until I had the bushes in and bolts on. But it was still a breeze compared to what we had back on the roadster.
After attaching the upper Panhard bolt to the body, I made sure that the right-side mounts correctly between the axle and leaf spring. While the poly bushes in the front where all toast – the rear ones were in perfect condition. I just cleaned them in soapy water and greased them with white grease (found as little plastic pack with poly bushed). With the U-bolts on the right side in place – I wiggled the left side of the axle into the correct position and secured it as well. Driveshaft bolts (tightened to 30ft/lbs), hand brake cable and brake line went back on today. But it was so cold in the garage that I left it as point.
Bleeding the brakes, double check the oil level of the axle (some people might remember why I need to do this ….) and getting the new wheels on should hopefully be done tomorrow. Next week I will combine a business trip to the UK with visiting my son and a spare supply run. In theory I could take Maggie – I currently have used 195/65R15 winter tyres to test clearance on the wheel. But I don’t want to leave her parked on the streets of Uxbridge for a week. Miffi would be great – I intend to stop as Swiftune anyway. But I need a larger car… might post some pictures next Friday 😉


Hi Tim,
I have a somewhat diffrenet approach installing the rear springs: I start with the rear shackles and then only the front.
Otherwise: I do not use polys in the front of the rear spring any longer. In my case it rumbled like hell – so I changed back to rubber.
All the very best Andreas
LikeLike
Hi Andreas. Will give the shackles first a try next time, but hat the feeling that the other way around that I went is even easier.
Poly or rubber bushes comes down to personal taste, but I also left the front bush of the leaf springs as it was. Rubber is prefitted with new leaf springs.
LikeLike