With summer coming closer the main priority is to get the Morgan back on the road. All bookings for our Bonn-Barecelona-Balears trip have been made by now. But C6622 is currently not going anywhere without a wiring harness. Even though I started rebuilding the loom back in November last year I never got around to finish it. Mainly because I kept changing my mind about how to do it. Without wanting to go into much detail – brown & white cables in British cars that follow the BSAU7 wiring code – are unfused. If one of those cables gets in contact with the bodyshell – there will be short circuit that is dangerous. The wires will get hot and melt.
White it the ignition circuit. The only unfused (white) connections I had left were for the distributor and for the Weber 32/34DFT carburettor idle solenoid. This is how it is wired from the factory, and I did not think much about it when I added additional fuses back in 2021. When the idle solenoid does not get 12V it closes a valve that stops the fuel supply in the carb. This cable came loose, touched the inner wing, and caused a good part of the right-side wiring to melt.
One design goal was to get rid of all unfused connections – with currently one exception: the distributor. I am not 100% certain if this is a good or bad idea but my thinking was: If there is a short-circuit that blows a fuse – the engine would cut-off immediately without my control. Maybe this is stupid and I might fit a line-in fuse later – I need to get more opinions about this.
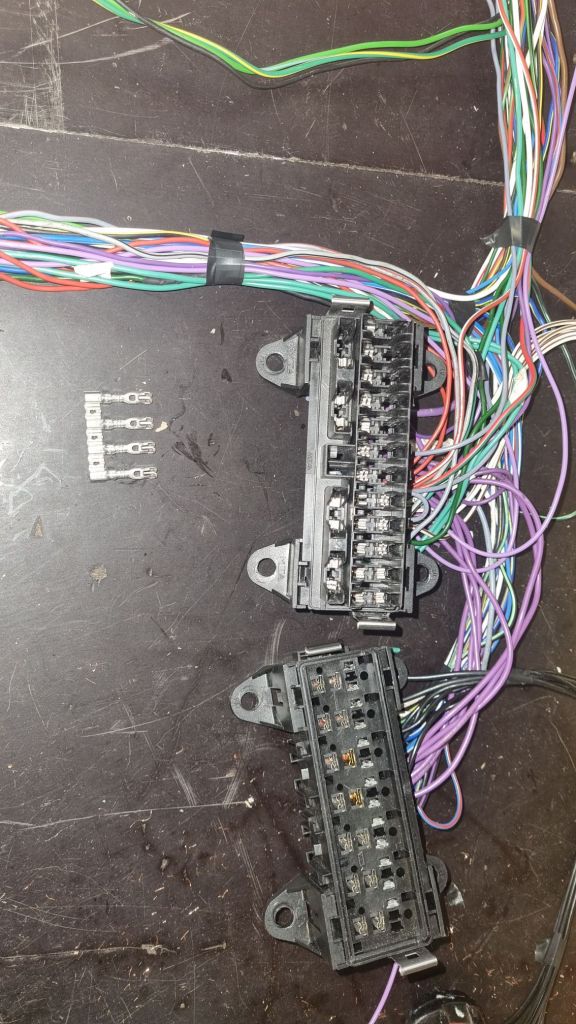
Another design goal was to get rid off the cheap additional “power distribution” fusebox I added last year. The space behing the dashboard is limited. The cabling was very close to the vent hoses – it was not optimal. With the introduction of this fusebox I also did no longer use 5 out for the 16 fuse holders in the MTA fuse box. What I was missing is a good way to splice the brown battery feeds via a bus to multiple fuses.
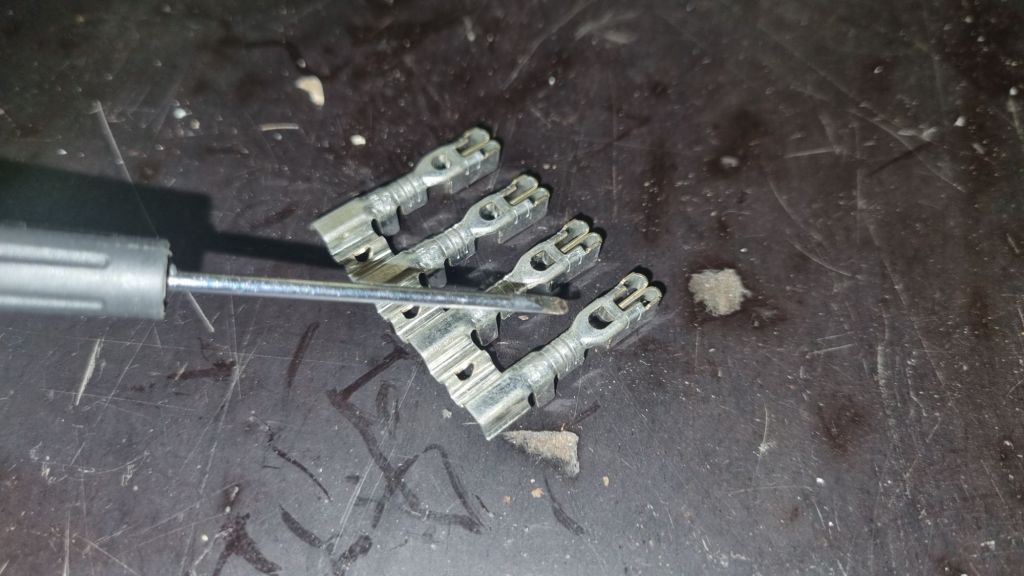
One of the cheap fuseboxes I got for testing had such bus bar holders – but without a clip and shaped differently. But the solution exists for the MTA boxes in form of the Uni F630 bus bar with clip. It turned out to be a challenge to get this part though. In Germany Autoteile Plauen used to sell them in smaller quantities to end-customers like me. I ordered parts from them before and can recommend them. They are friendly, responsive and deliver fast. But they can no longer supply the F630 bus bar.
ConnectorID.com can supply them – but they are located in the US – with shipping and tax a somewhat expensive option. After quite a bit of searching I found an online shop in Poland called Konektory.pl that sells them. But I don’t really speak polish besides “Poproszę piwo. Nie, dwa.” and besides – they only deliver to addresses in Poland. My colleague Artur from Warsaw came to rescue. I pinged him yesterday. He called them and already received the parts today and mailed them to me. Dziękuję bardzo!!
As I am now have to wait to finish the Morgan, I have time to do some other things. The idea for tonight was to complete the MG brake calipers. The parts arrived earlier today after just three days. Orders from Moss are now delivered with Fedex almost as fast before Brexit – which is great. But as I was focussed on cabling – I decided to test out something else. Back at MGB60 in the UK I found a “NOS” (new-old-stock) electric window kit for the MG. Well, naming it NOS is a funny way to resell an unused part from Moss but whatever.
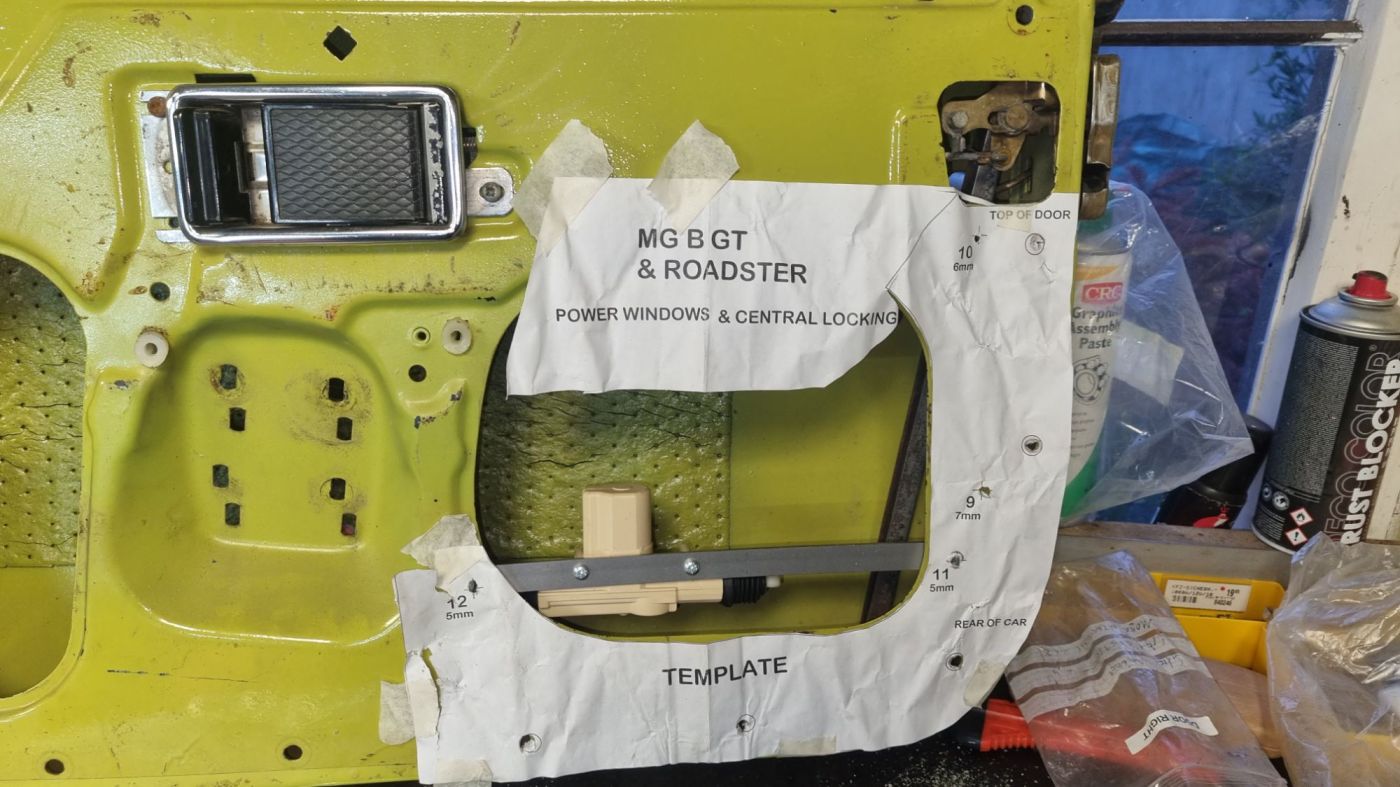
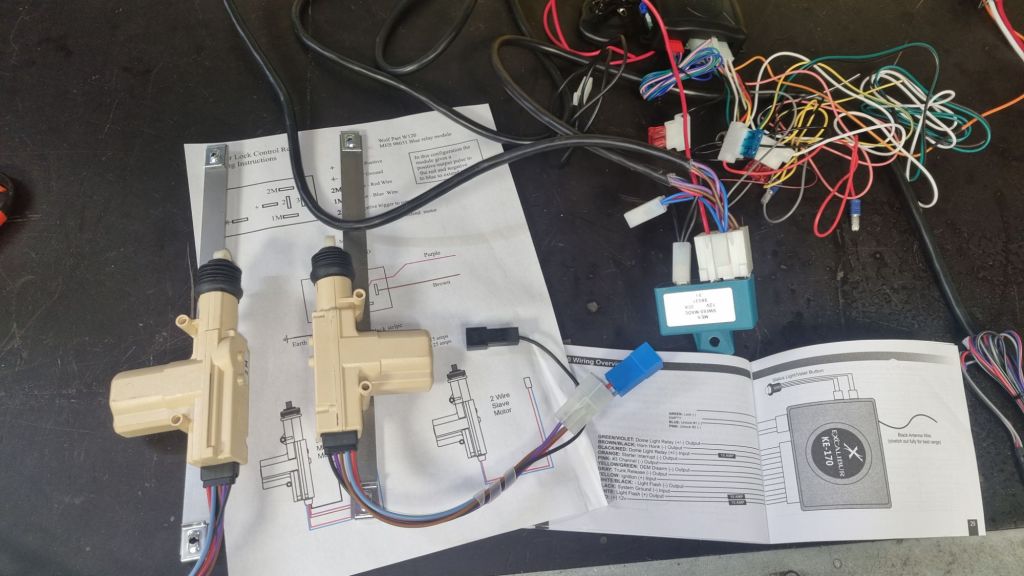
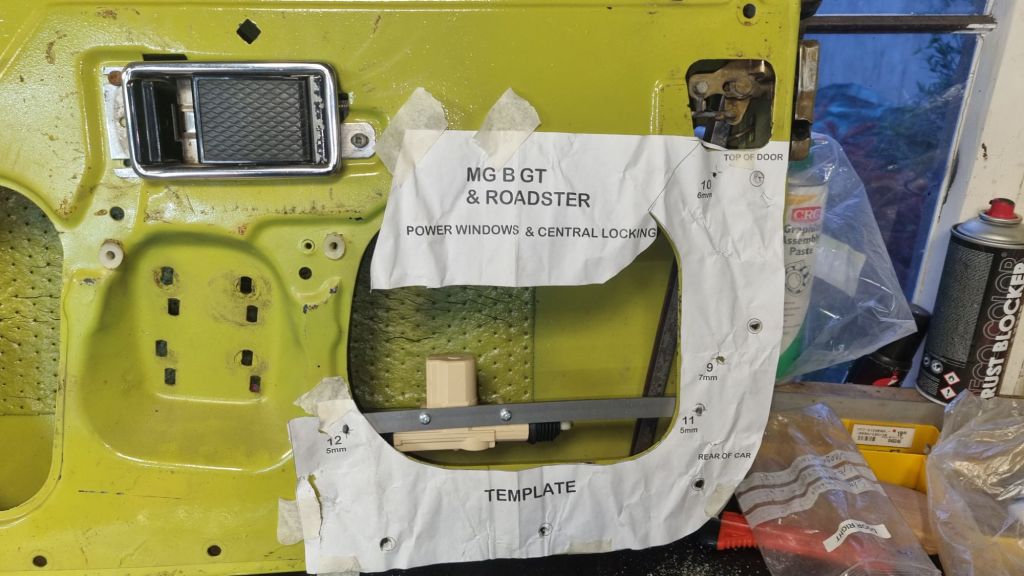
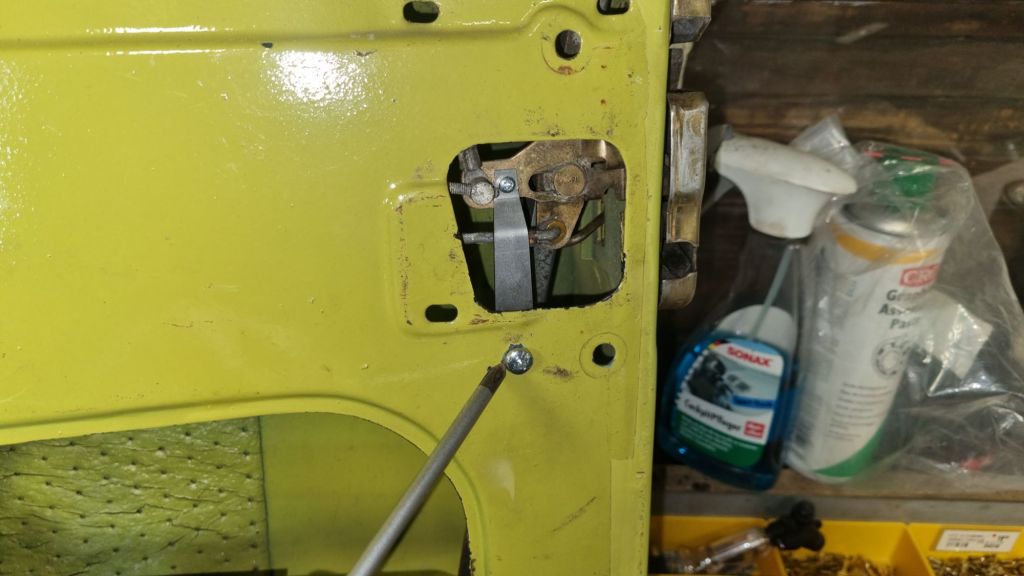
Project Mildred will get some modifications that might not be everybodies piece-of-cake. But it is my car – so why not? A remote controlled central locking kit with join the electric windows. And all of this needs to be added to my MGB wiring plan. To mount all of this a few holes need to be drilled into each door. And I want to do this before I get the doors painted. As I also have two spare doors, I decided to do a test installation. The wiring instructions are basic but sufficient. The remote control unit has a bunch of cables – but most of them are not needed. The blue and green cable from the control unit will send a positive signal for Lock and Unlock – this needs to be connected to the brown and purple wire on the locking kit. This is not directly mentioned, but logical once I saw that the blue and red connections are negative wired triggers.
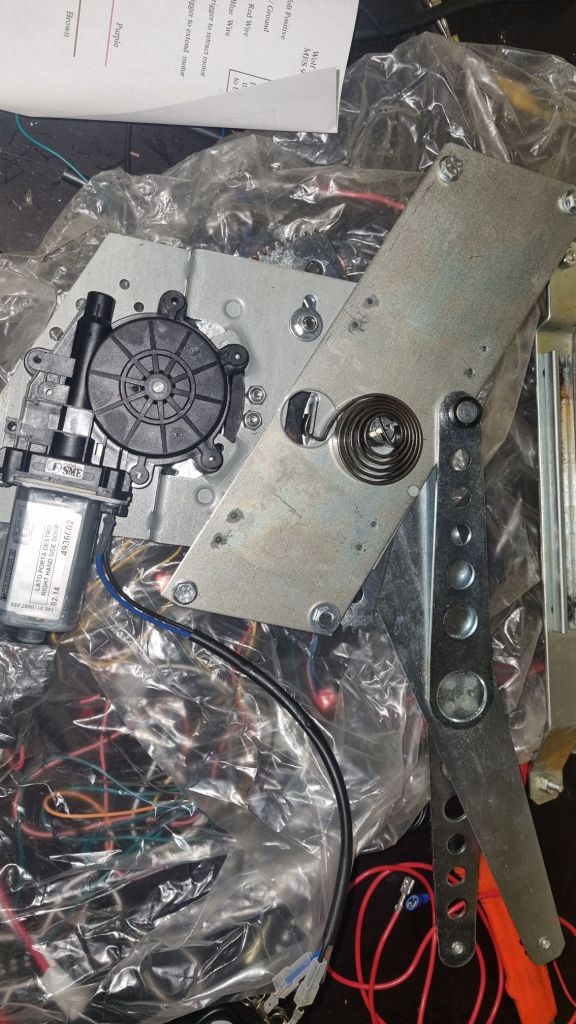
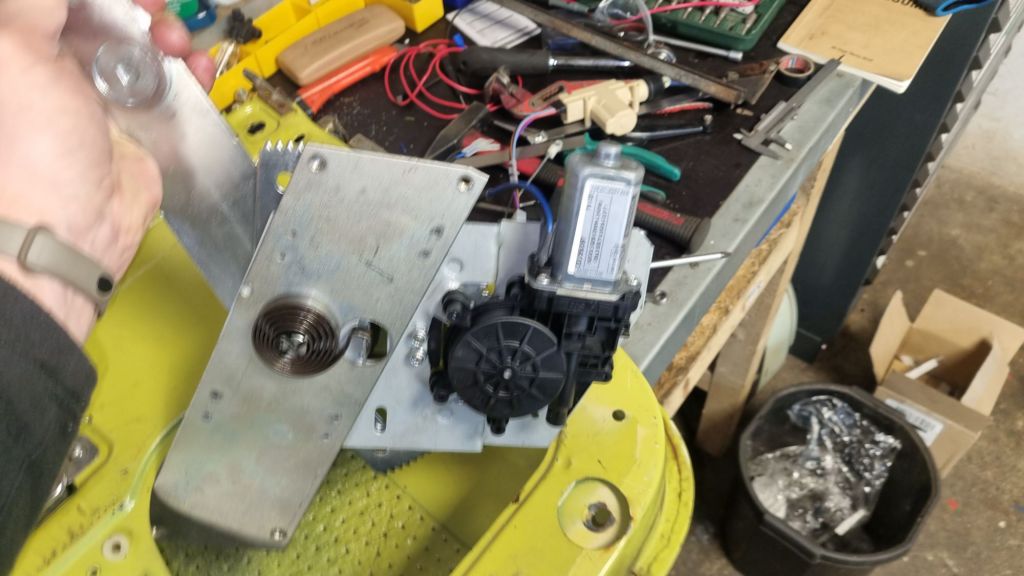
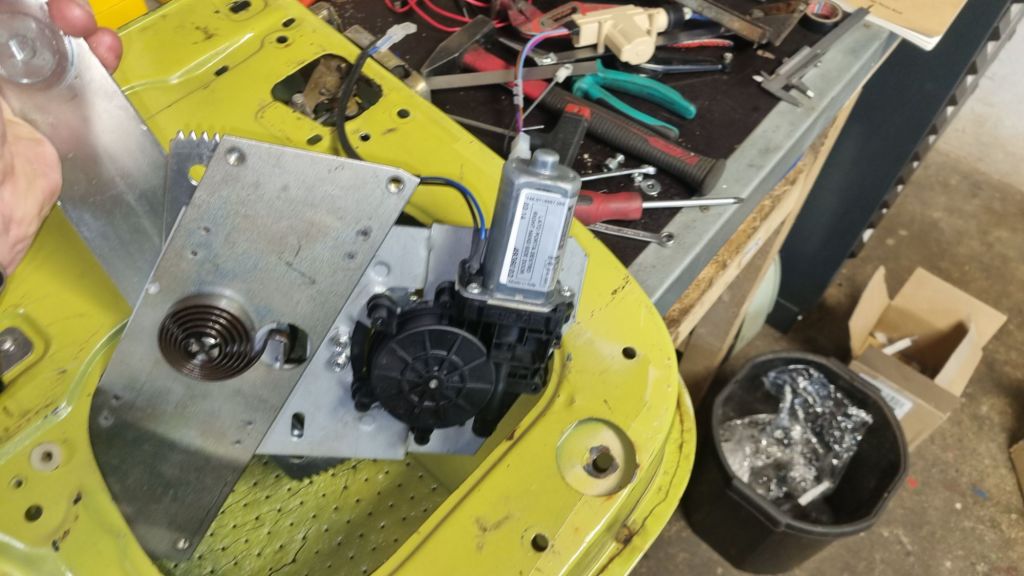
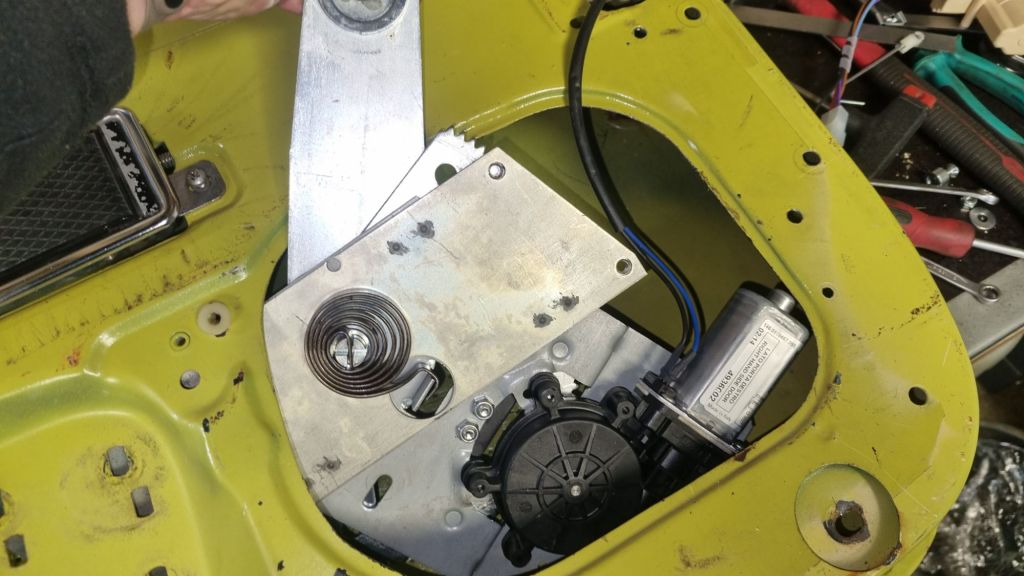
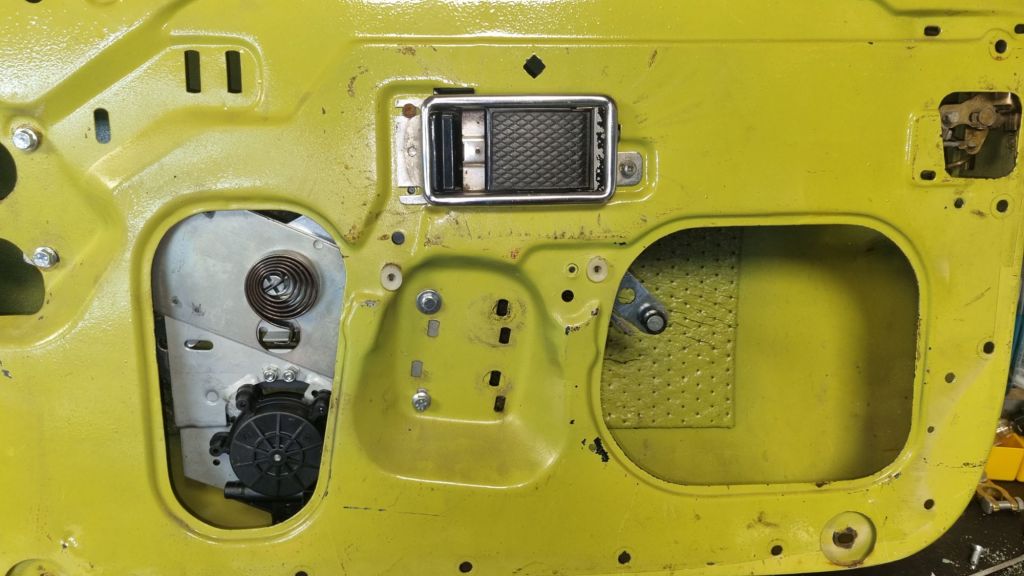
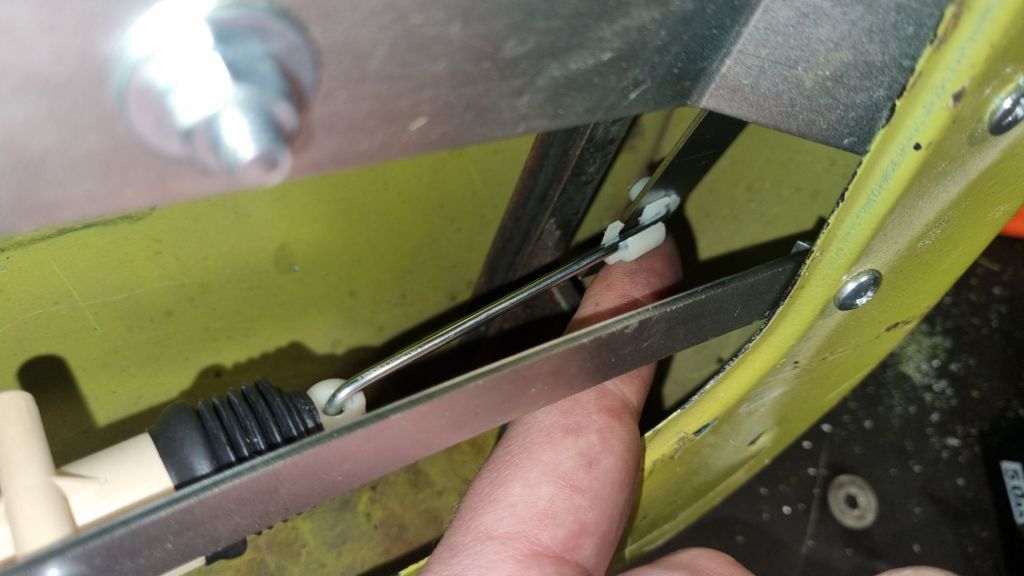
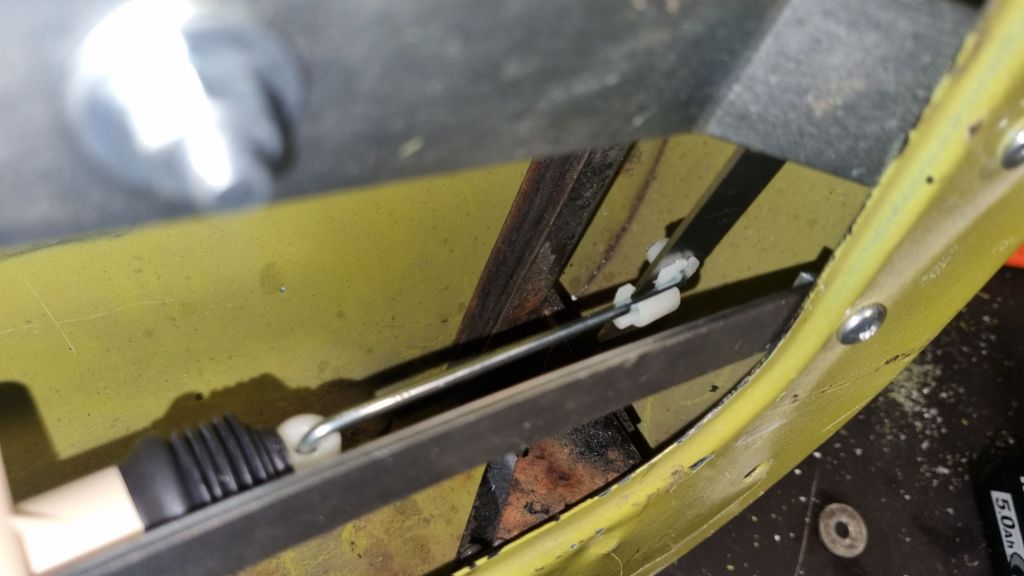
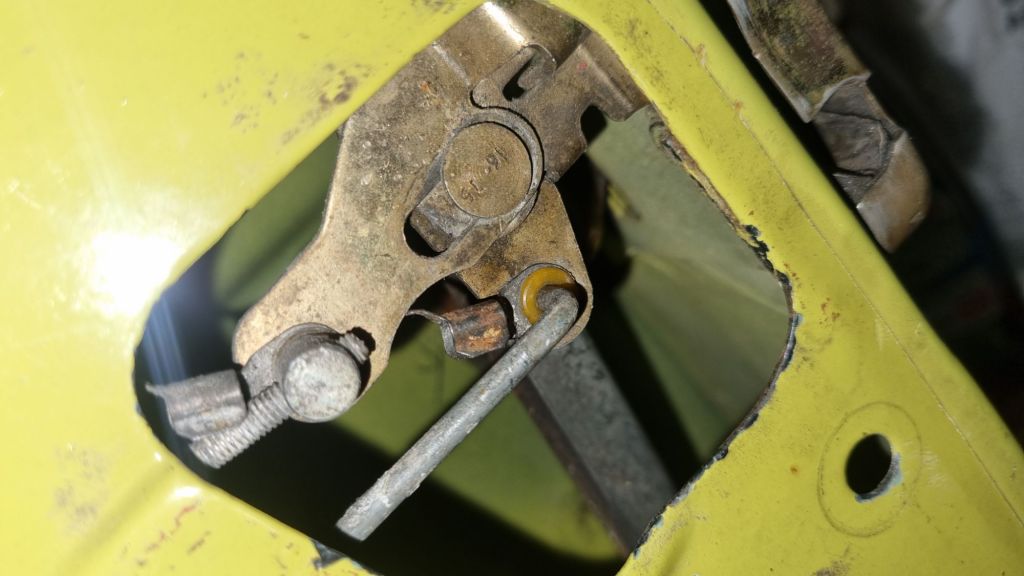
Getting the window motor into the door requires the correct angle – I hope that the pictures below help me and others later. The locking kit is easy to install – but the lever requires a bit of bending so that the accuator moves the lever in a straight line. I believe a 3d printed guide piece could be beneficial here. The pivot screw for the lever needs to tight. After adding a few washers between the door skin and the lever (including to nylon washers) it moved much better. Last part I need to do now sorting the cable routing in the door as well as finding some rubber piece to connect it to the A-post. I will not use the hinge like in this example but I started looking for those Hyundai tailgate boots shown here

Hard work Tim but looking good!
LikeLike